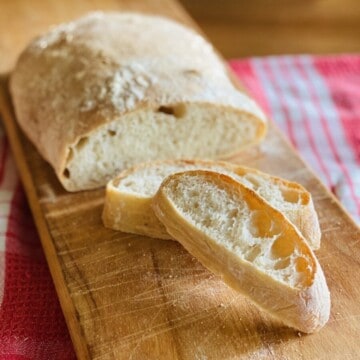
How to Make Artisan Ciabatta Bread
Homemade rustic artisan ciabatta bread has a crispy crust and a tender chewy inside. This classic Italian recipe comes out so good & is easy to make. There is nothing like fresh-baked bread straight from the oven.
Ingredients
Sponge Ingredients
- 1 C flour
- ⅛ teaspoon active dry yeast
- ½ C warm water between 105-110°
Dough Ingredients
- 2 C flour
- 2 teaspoon salt
- ½ teaspoon active dry yeast
- ¾ C warm water between 105-110°
- ¼ C whole milk
Instructions
- Make the Sponge – Combine the cup of flour, ⅛ teaspoon of active dry yeast, and ½ cup of warm water (for a correct yeast activation ensure the water is between 105-110°) in a medium bowl. Stir with a large spoon or rounded rubber spatula until it all comes together. Do not over mix. Cover the bowl with plastic wrap. Let the sponge work its magic at room temperature for at least 12 hours or up to 24 hours. If your home is cold, cover with a light kitchen towel also.
- Make the Dough – Get out your stand mixer. Scoop out the sponge and put it in the bottom of your stand mixer bowl. Add the remaining ingredients for the dough; 2 cups of flour, 2 teaspoon salt, ½ teaspoon active dry yeast, ¾ cup of warm water (again at 105-110°), and ¼ cup whole milk. Using the paddle attachment, mix on low speed until combined, about 1 minute.
- Mix - Scrape down the side with a rubber spatula as needed to ensure the wet and dry ingredients come together. Increase the speed to medium-low and continue mixing until the dough comes together and forms as one large sticky dough mass and no longer collects along the sides of the bowl. It should take about 4 to 6 minutes and look like the two photos above as it comes together. It is a sticky dough but have patience. It will combine and become one large mass.
- Knead with Mixer - Scrape the dough from the paddle attachment. Change to the dough hook and knead the bread on low speed for 2 minutes. Then turn up to medium speed and knead for 8 minutes. The dough will still be sticky. Remember this is a high hydration dough, that is how it should be. Do NOT be tempted to add more flour.
- Rest & Rise - Scrape dough from the dough hook and place it in a large mixing bowl. You want to make sure the bowl is large enough for the bread to dough in size and still have additional room. Cover tightly with plastic wrap, and let rest at room temperature for 1 hour. The dough will rise and double in size.
- First Fold and Rise – Peel the plastic wrap back to expose the dough. Spray a rubber spatula with non-stick cooking spray. Starting from the edge of the bowl, using the spatula gently pull a ¼ section of the dough while lifting it towards the middle and fold the dough over itself. Rotate the bowl 90 degrees, and fold again. Rotate the bowl and fold the dough 6 more times (for a total of 8 folds and a full rotation of the bowl 2 times). Put the plastic wrap back on and let rest for 45 minutes. It will rise to about double in size again.
- Second Fold and Rise – Repeat the same as in the above step. Peel the plastic wrap back to expose the dough. Spray a rubber spatula with non-stick cooking spray. Starting from the edge of the bowl, using the spatula gently pull a ¼ section of the dough while lifting it towards the middle and fold the dough over itself. Rotate the bowl 90 degrees, and fold again. Rotate the bowl and fold the dough 6 more times (for a total of 8 folds and a full rotation of the bowl 2 times). Put the plastic wrap back on and let rise for 45 minutes again.
- Shape Loaves and Final Rise – carefully transfer the dough to a floured work surface. I use a baking sheet since it is rimmed and contains all that flour for less of a mess. Dust the top of the dough with a good amount of flour and divide it into equal halves. With well-floured hands, shape the dough into about a 12×8-inch rectangle. Do not press down or work too much, you do not want to deflate the dough (you want those bubbles to form later as it cooks). Lastly, fold the short sides of the dough toward center, overlapping them like you would fold a letter in thirds, to form an 4×8-inch rectangle. Repeat with the other half of the dough. They do not need to be perfectly sized, again these are rustic but near that size will help the timing baked properly.
- Rest Loaves & PREHEAT- Cut two 12×6-inch pieces of parchment paper and dust lightly with flour. Gently transfer each loaf, seam-to the parchment sheets, and place seam-side down. Dust the tops with very little flour, and cover loosely with plastic wrap. Let the loaves sit at room temperature for 30 minutes. The loaves will expand further and have tiny bubbles develop on the top during this final rest. AT THIS POINT PREHEAT THE OVEN TO 450° DURING THE FINAL RISE STAGE!
- Prep the Loaves – Slide each parchment piece and loaf onto a pizza peel. Using floured fingertips, evenly poke the entire surface of each loaf to form a 10×6-inch rectangle shape. Dust off any excess flour, a little is fine but you do not want dry chalky flour clumps that will not be appetizing. If you wish to add sea salt to the top, now would be the time.
- Spray & Bake - Using a spray bottle, spray the loaves lightly with a mist of water. Slide each loaf and parchment onto the baking stone one at a time after spraying with water. Bake the loaves at 450° and continue spraying the loaves with water two more times more during the first 5 minutes of baking time. Once the crust turns golden brown and has baked for about 25 to 30 minutes, they are ready!
- Cool and Eat – Transfer the loaves to a wire rack, remove the parchment, and let cool. You will want to slice and eat it right away but do not be tempted. Let them sit at room temperature for at least 30 minutes before slicing and serving. This ensures the crust is set and the air pockets are cooled and formed. This creates the lovely balance of the crisp outside and tender airy inside.
- The bread can be wrapped in a brown paper bag rolled tightly closed and stored at room temperature for up to 3 days.
Tried this recipe?Let us know how it was!