Dry Brine for Smoking a Turkey
In just 3 days you can have the perfect holiday bird. When you dry brine a turkey, it is so moist and juicy. This works great for turkey, chicken, and other birds when smoking them. (also great if you oven roast or deep fry your turkey too!)
Equipment
- baking sheet
- 13-gallon unscented trash bag
Ingredients
- 1 TB kosher salt PER 4# OF TURKEY (or chicken)
- Whole Turkey or chicken
Instructions
- Cut open the packaging to remove the turkey. Next, remove the turkey parts that are packaged within the turkey carcass (typically neck bone, heart, liver, etc). Discard or save for other uses later, like turkey neck soup!
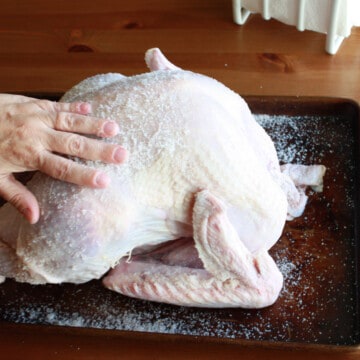
- I pat the skin dry as much as possible. This is so that any moisture does not start to dissolve the salt immediately. The key is to have the salt absorb slowly and work its magic through the skin and into the meat below.
- At this point, I measure out my salt and start with the breast side up. On this side, I tend to use about ⅔ of the salt. I sprinkle it all over the skin facing up and concentrate on the breasts and thighs the most. This is because these areas are not only a very meaty section but can be the first part to dry out when cooking. Therefore, the more dry brine in that area, the better. For the underside, the wings and bottom of the thighs are where I concentrate the salt.
- Once the entire bird is coated and the salt is patted on evenly to stick, it is ready for the refrigerator. With the assistance of my husband, we get the bird into a large bag. I use a large 13-gallon trash bag (UNSCENTED is key). I then twist tie it closed. The bagged turkey goes on a baking sheet into my refrigerator.
- Every day I will rotate the bird each morning and each evening so it can be breast up at times and breast down at times. Each time I rotate, I will also “massage” the bird through the bag and work that salt in.
- When it is time to cook your bird, simply remove it from the sealed bag. Pat it dry. There is no reason to rinse it, the bird will not be “salty”. Then season, dressing, roast, smoke, fry, or whatever next steps you do.
- How long to cook a turkey times are listed above. Enjoy!
Tried this recipe?Let us know how it was!