
Up your Rice Krispies treat game & make Fruity Pebbles cereal bars instead. The brightly colored treats are that perfect combination of chewy gooey marshmallow & crunchy puffed rice cereal with that intense fruit flavor we all love. This no-bake recipe is so quick & easy, making it perfect for a yummy snack or dessert anytime.

Why have plain marshmallow treats when you can have these fun, pretty, & colorful ones instead? Make these for after-school snacks, lunchboxes, parties, birthdays, bake sales, potlucks, & holidays. These were inspired by my M&M Rice Krispies Treats recipe which is also a kid's favorite.
Jump to:
Ingredients
This recipe only requires 4 ingredients to make the best chewy marshmallow & Fruity Pebbles treats. The recipe is similar to traditional Rice Krispies treats with the classic ingredients - you are just using bright colorful Fruity Pebbles instead of plain rice cereal.
I recommend using mini marshmallows and not jumbo or large ones. The mini marshmallows melt more quickly. Plus I have noticed that they combine with the butter better. This recipe is extra chewy & gooey with more marshmallows than other recipes! No chance these are dry or hard.
You can skip the optional white candy drizzle on top but I suggest you don't. The added vanilla-flavored topping is not just pretty but so yummy too. It is a nice touch to offset loads of fruit flavor in this recipe.
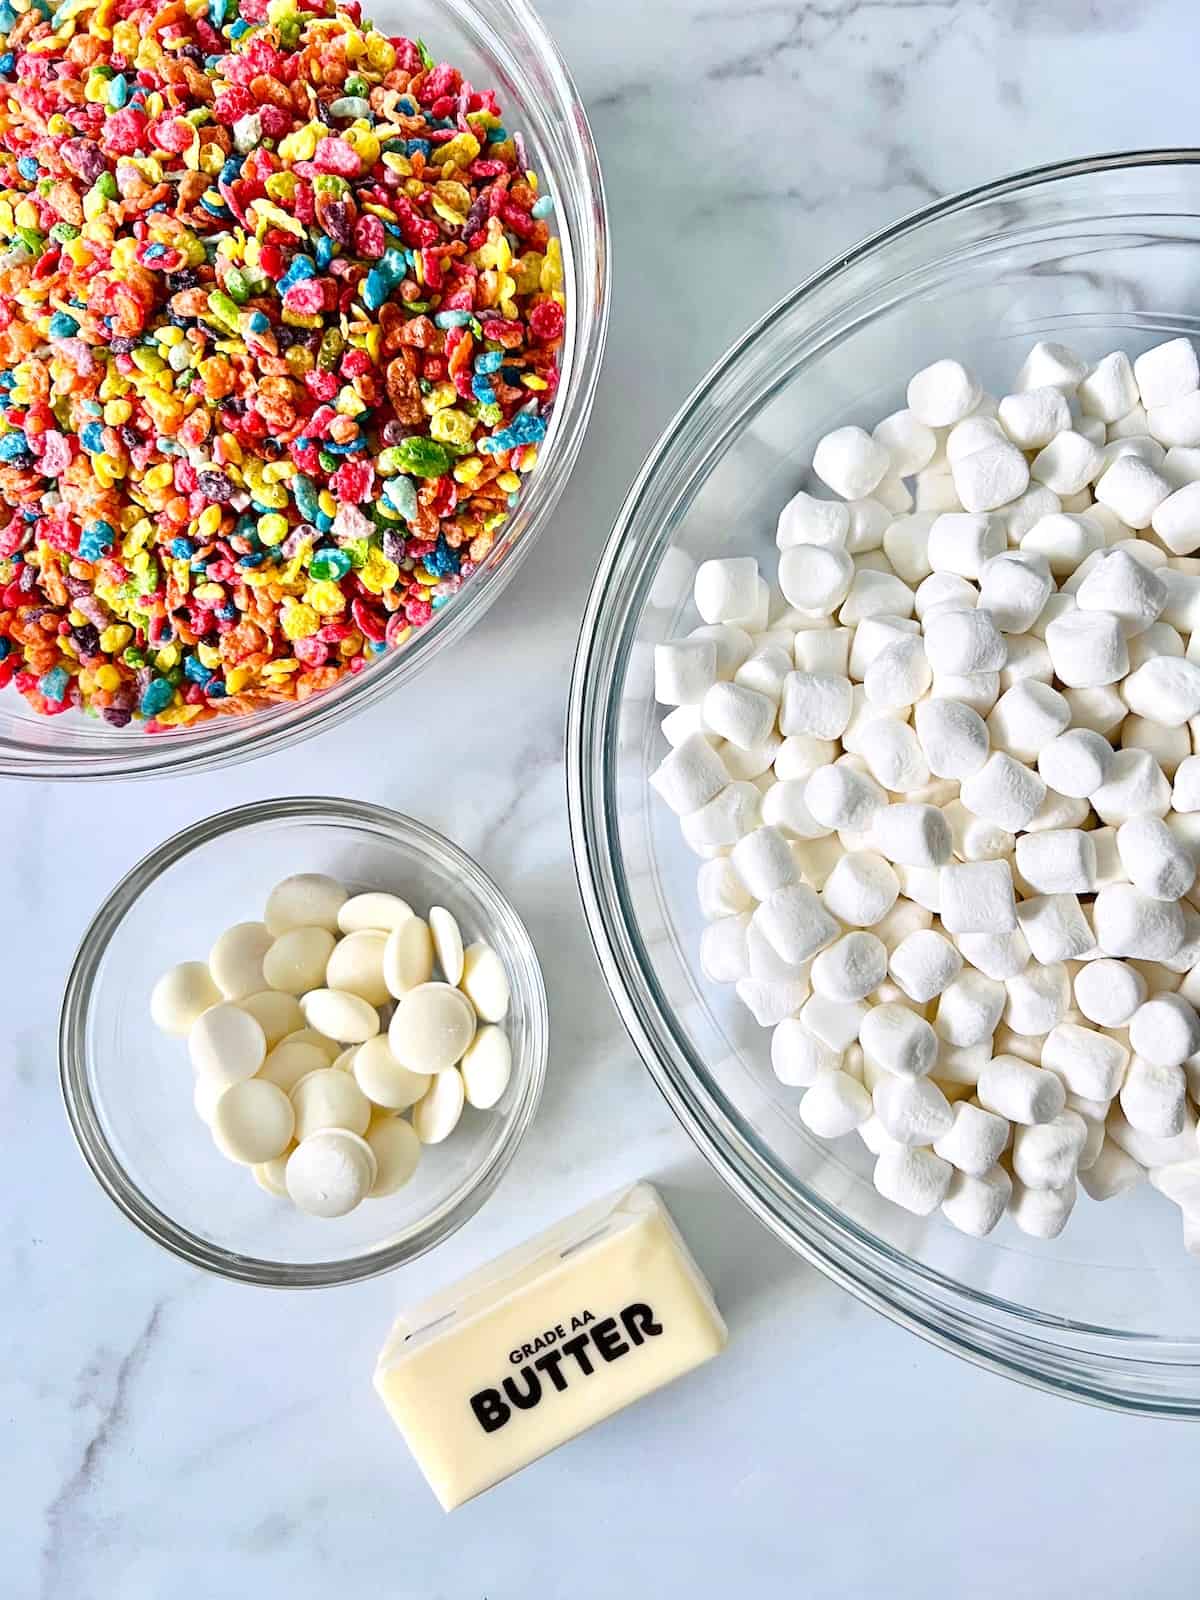
- Salted Butter
- Mini Marshmallows
- Fruity Pebbles Cereal
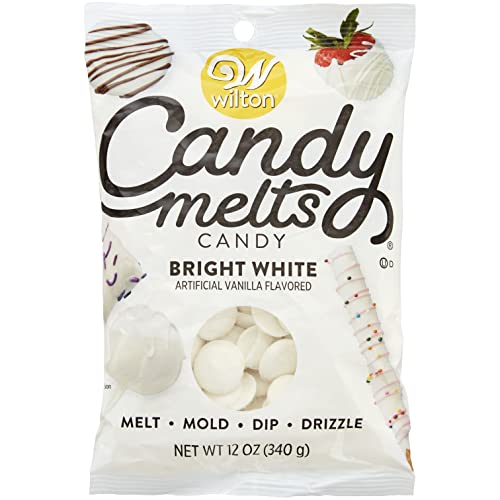
- White Candy Melts - optional
See the recipe card for quantities.
How to Make Fruity Pebble Cereal Bars
I am making these marshmallow treats on the stovetop. Melting the marshmallows with the butter slowly while stirring is my favorite way to make rice Krispies treats so I do the same here. You can also make them using the microwave & I share those instructions in a section below.
Fruity Pebble Treats in 9x13 Pan
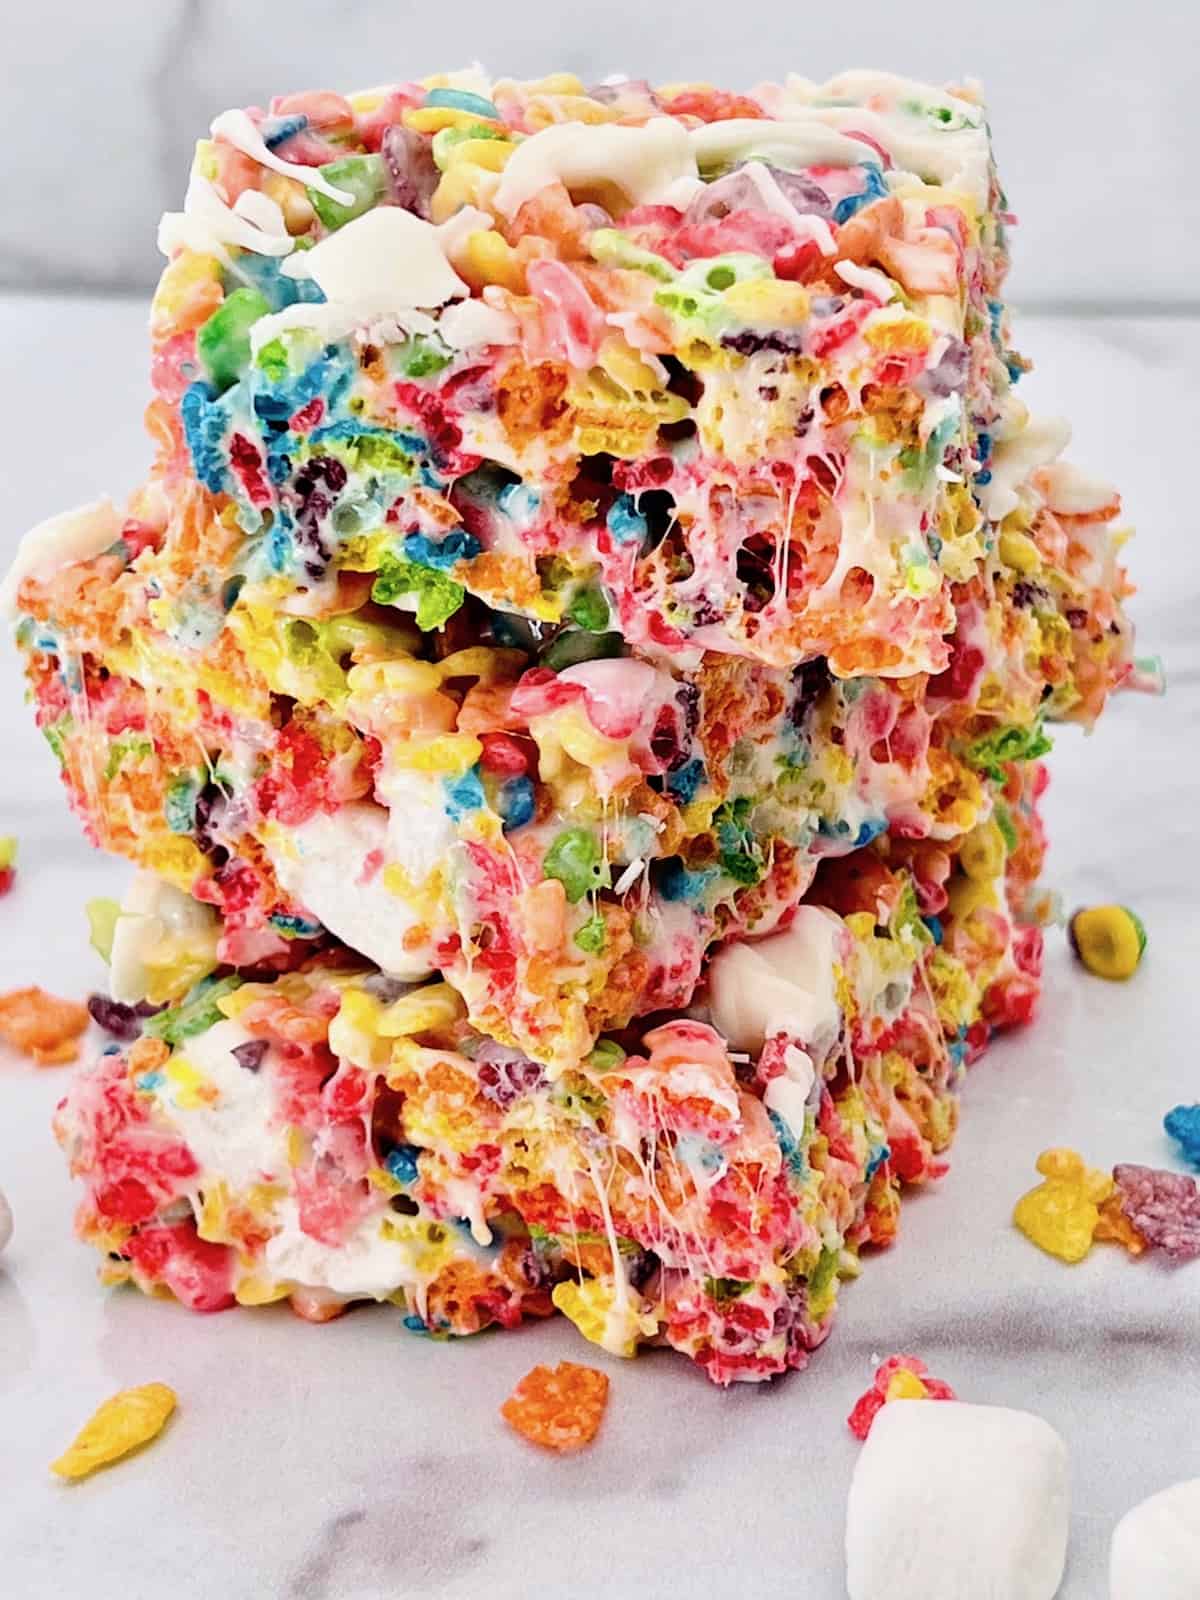
This recipe makes a large batch. You will get 15 squares with this recipe. See below for how to make them in an 8x8 pan for a smaller batch of 9 servings.
These treats will be made in a 9x13 baking dish. So begin by preparing the baking dish either with parchment paper or nonstick cooking spray. This will help get them out easily to cut into squares later.
Stovetop Instructions
Here are the step-by-step instructions on how to make Fruity Pebble marshmallow treats on the stovetop. It only takes a few minutes & it is easy to stir. I love using my spoonula for this so I can stir, fold, & scoop with the same tool.
Melt the salted butter in the large pot on the stove over medium heat. (salted butter is a good balance of all the sugars in this recipe)

Once melted, add the mini marshmallows. Stir and cook until the marshmallow is melted.
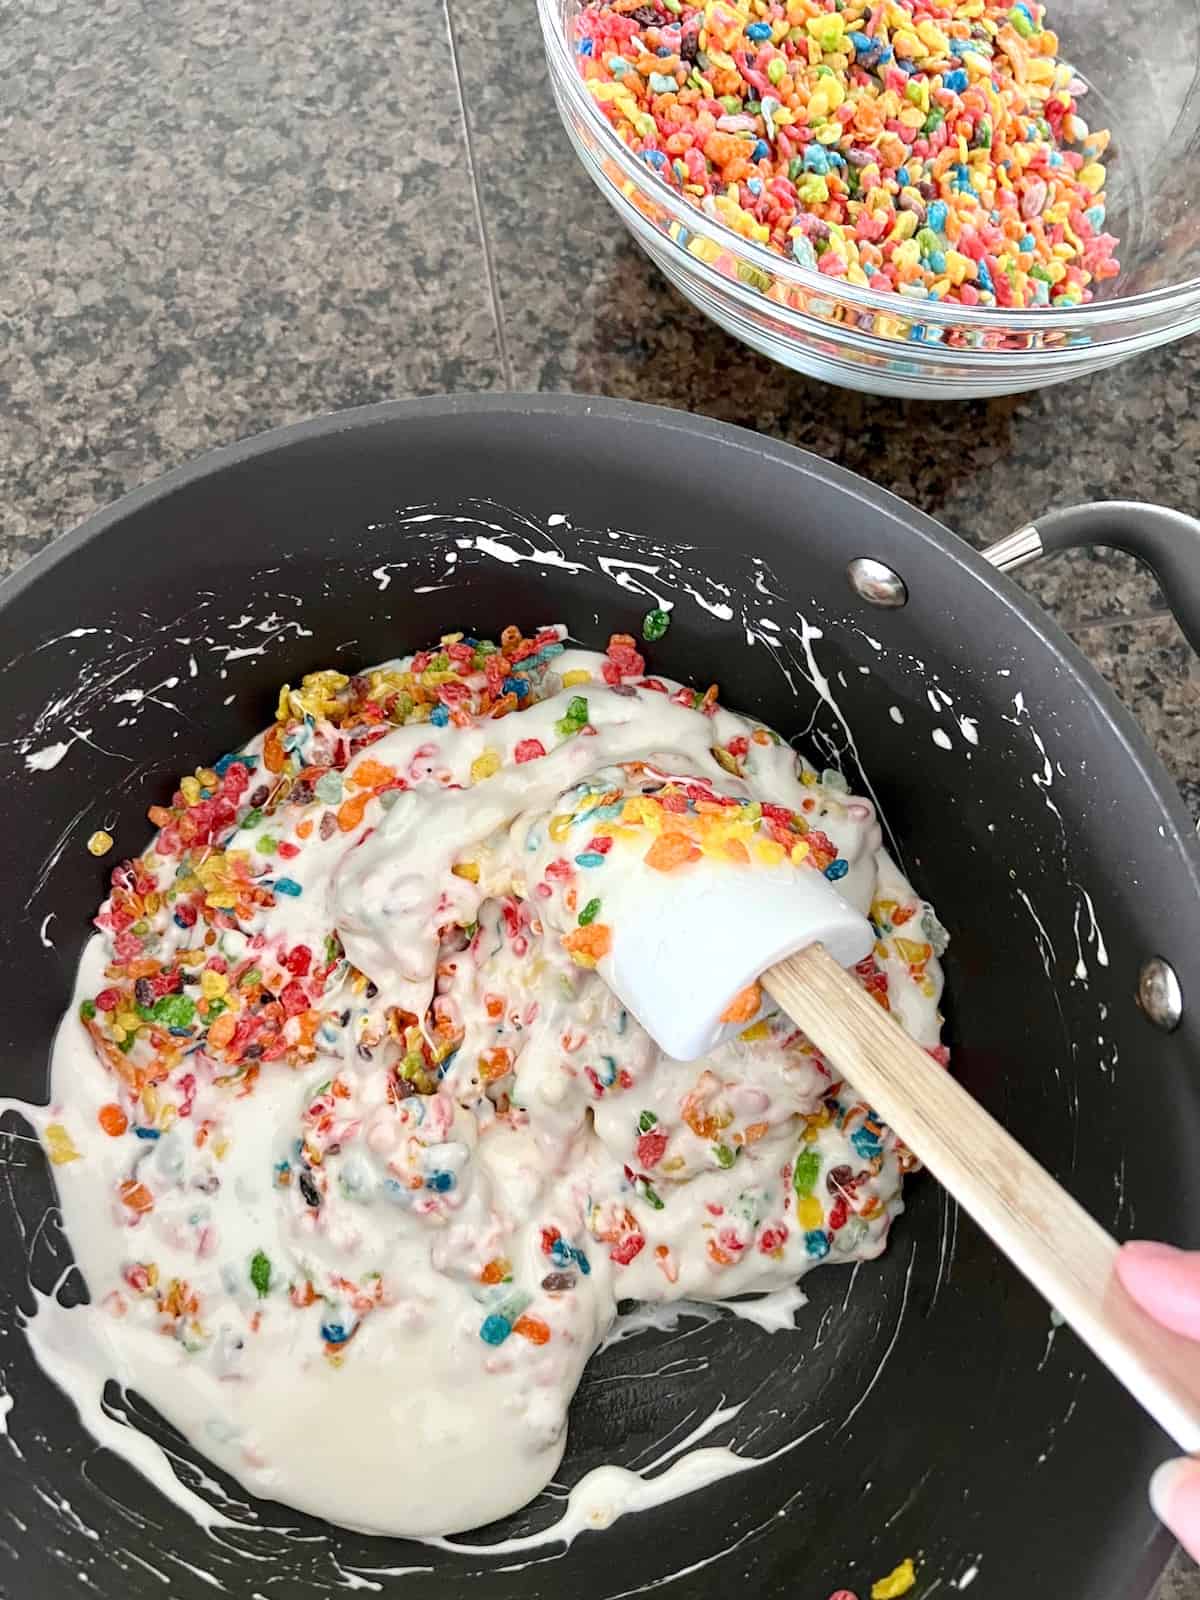
Dump ½ of the Fruity Pebbles cereal into the marshmallow mix. Fold to combine. Repeat with the remaining cereal.
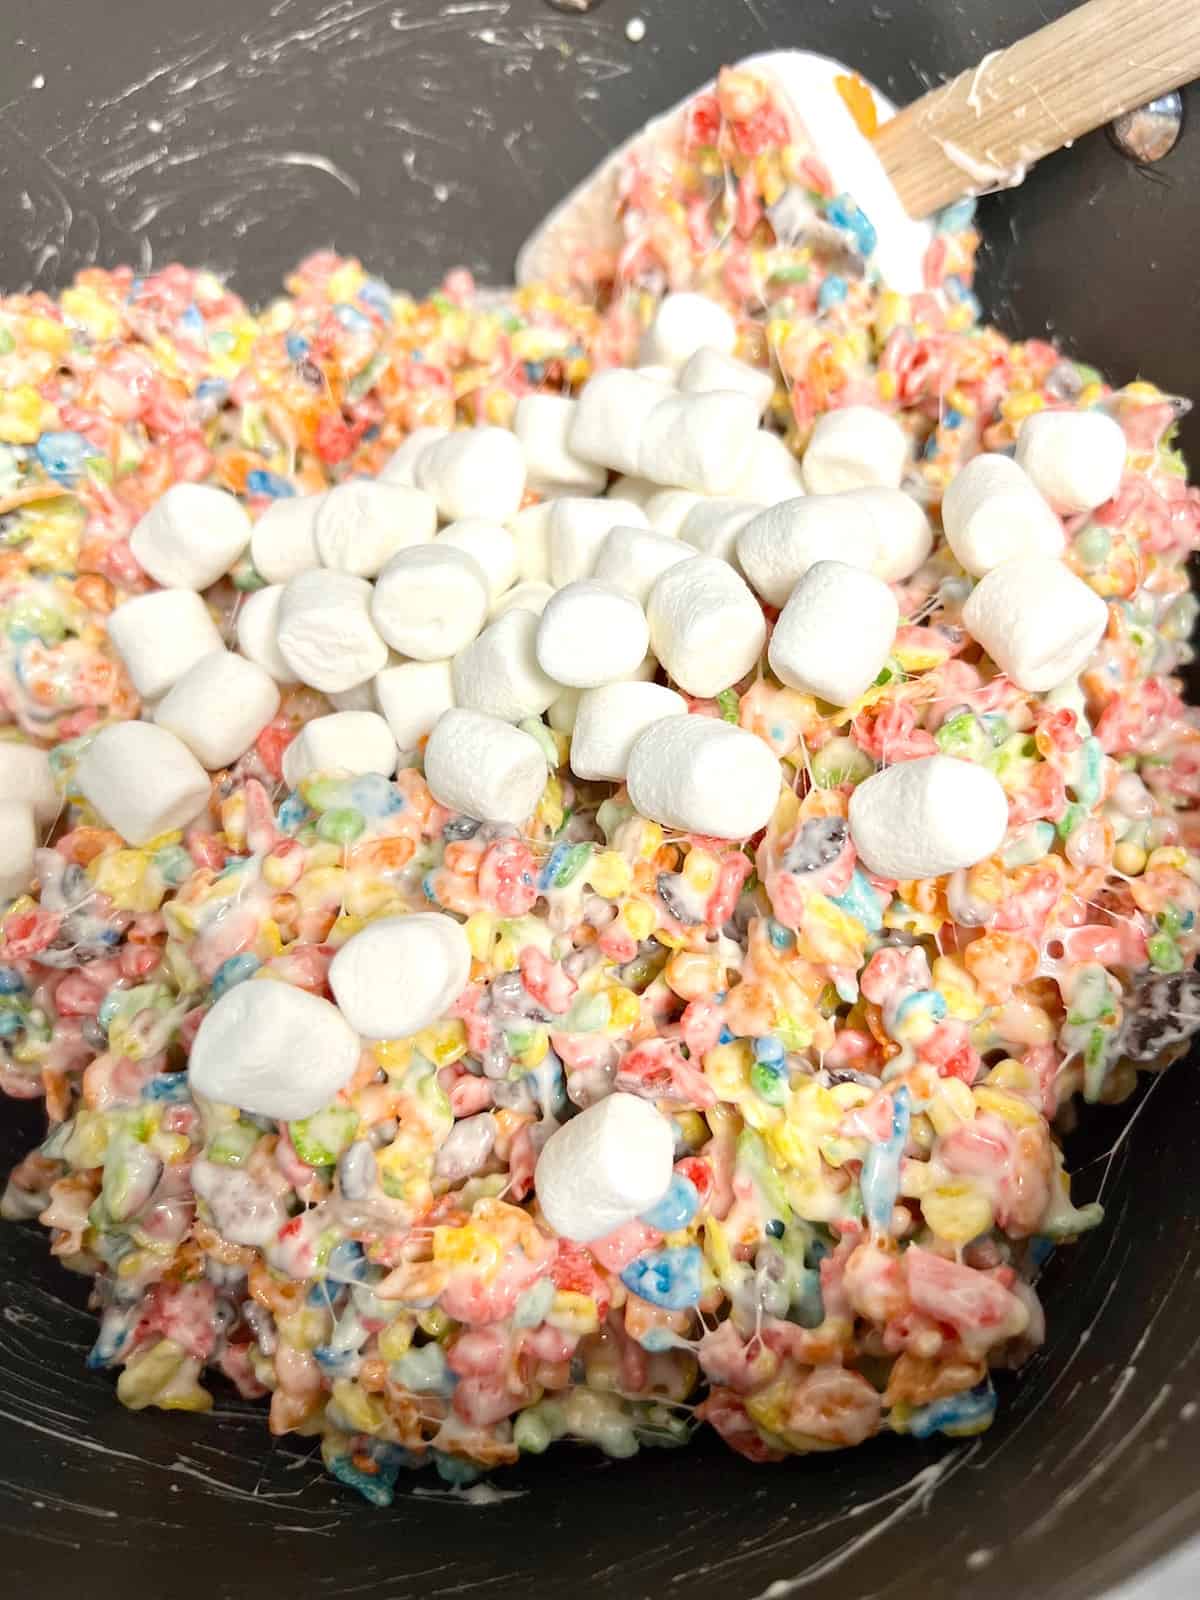
Add optional mini marshmallows at this time. Fold them into the mixture.
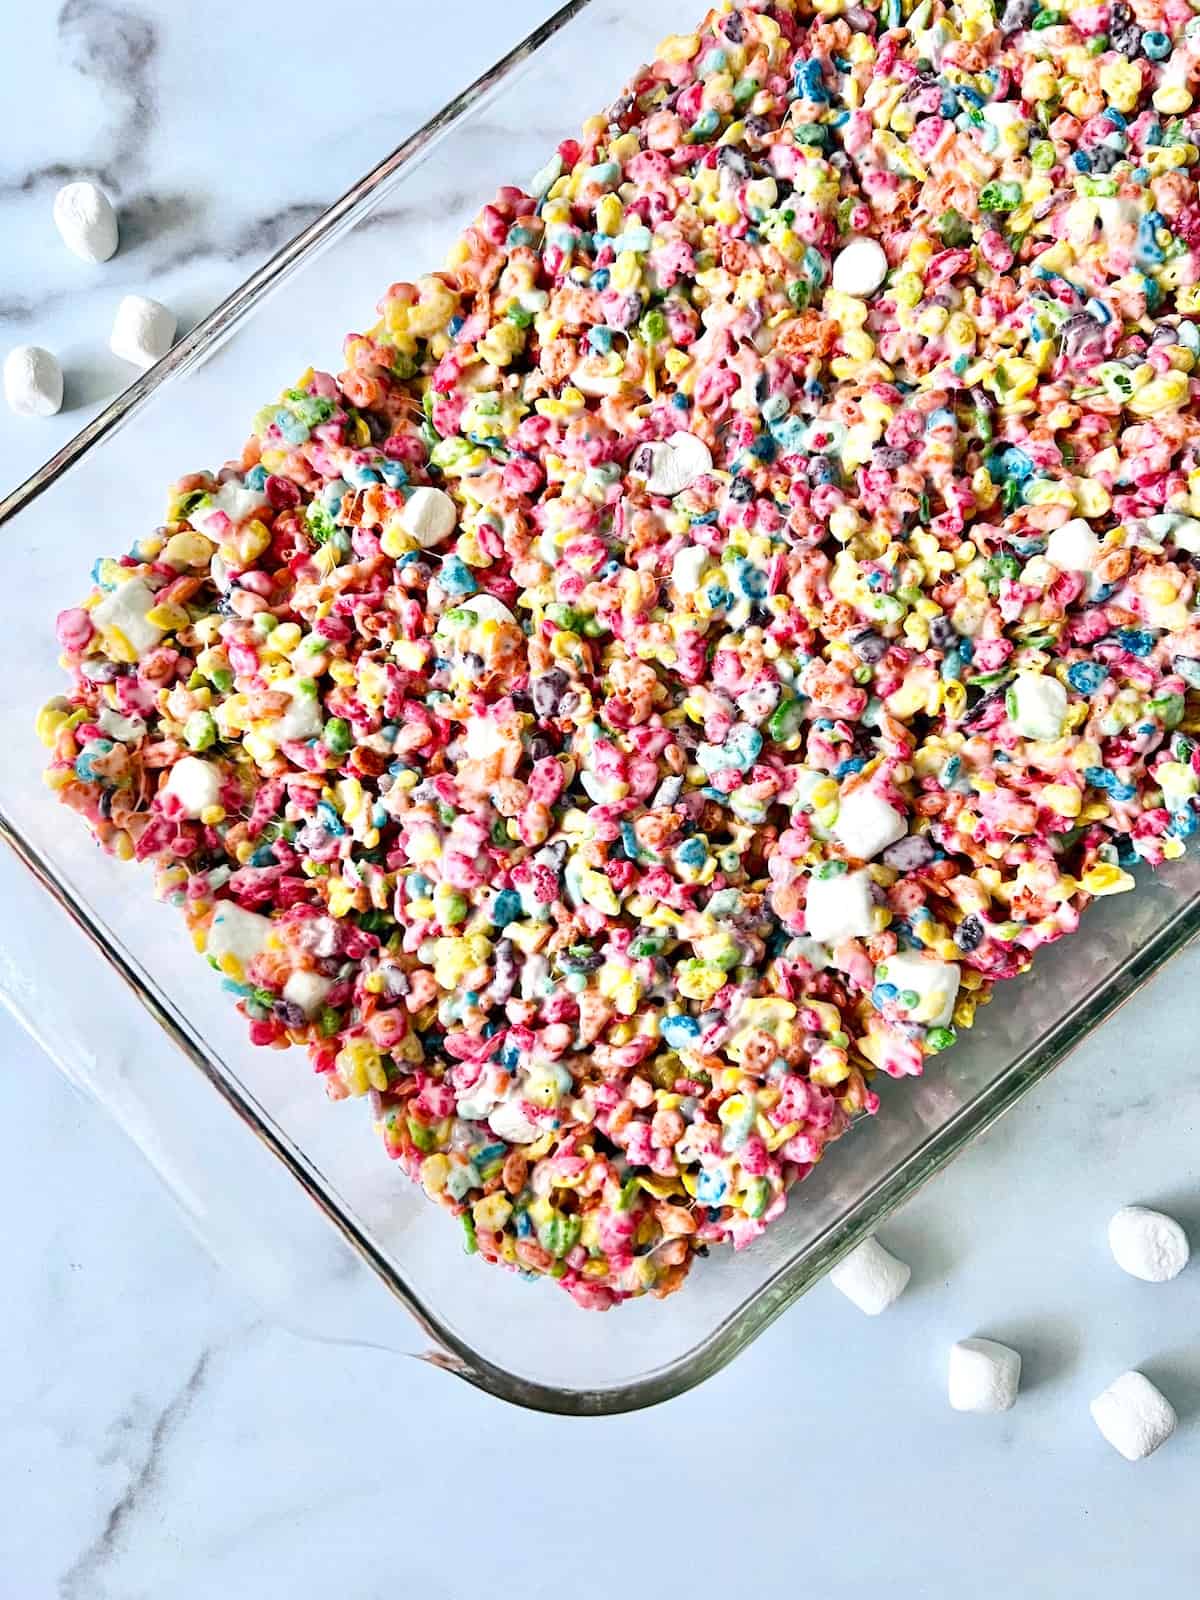
Spoon the mixture into the prepared baking dish. Gently spread it evenly in the pan.
TIP - DO NOT smash or press down the mixture too hard in the pan. You want that airy crunch to be there when you bite into them.
Topping & Cutting the Cereal Bars
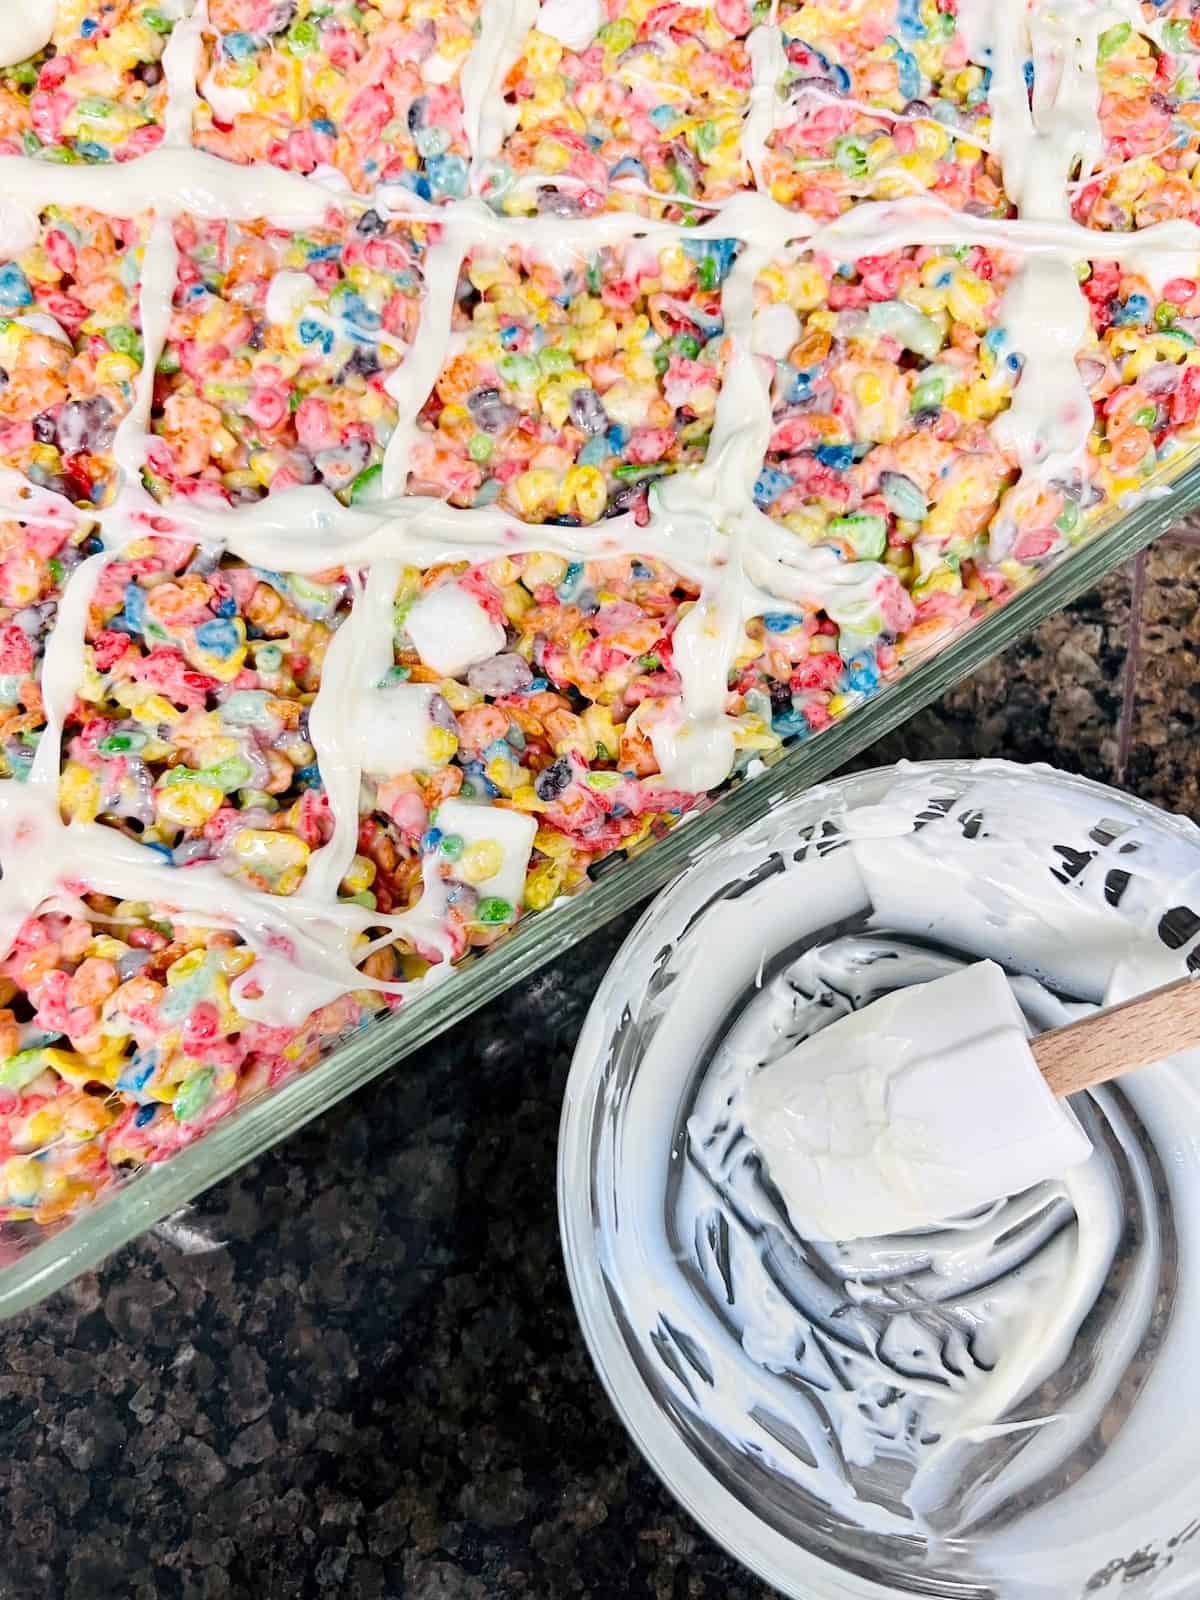
While the cereal bars are cooling in the pan, time to prepare the white candy drizzle. This is an optional step but so fun & tasty. You want to make sure you don't skip this step.
In a small microwave-safe bowl, add the white melting wafers. Microwave on high for 20-second intervals with stirring done between each set of cooking. Once the candy is melted & smooth, it is ready.
Drizzle & swirl it over the Fruity Pebbles in a zigzag motion or any design you like.
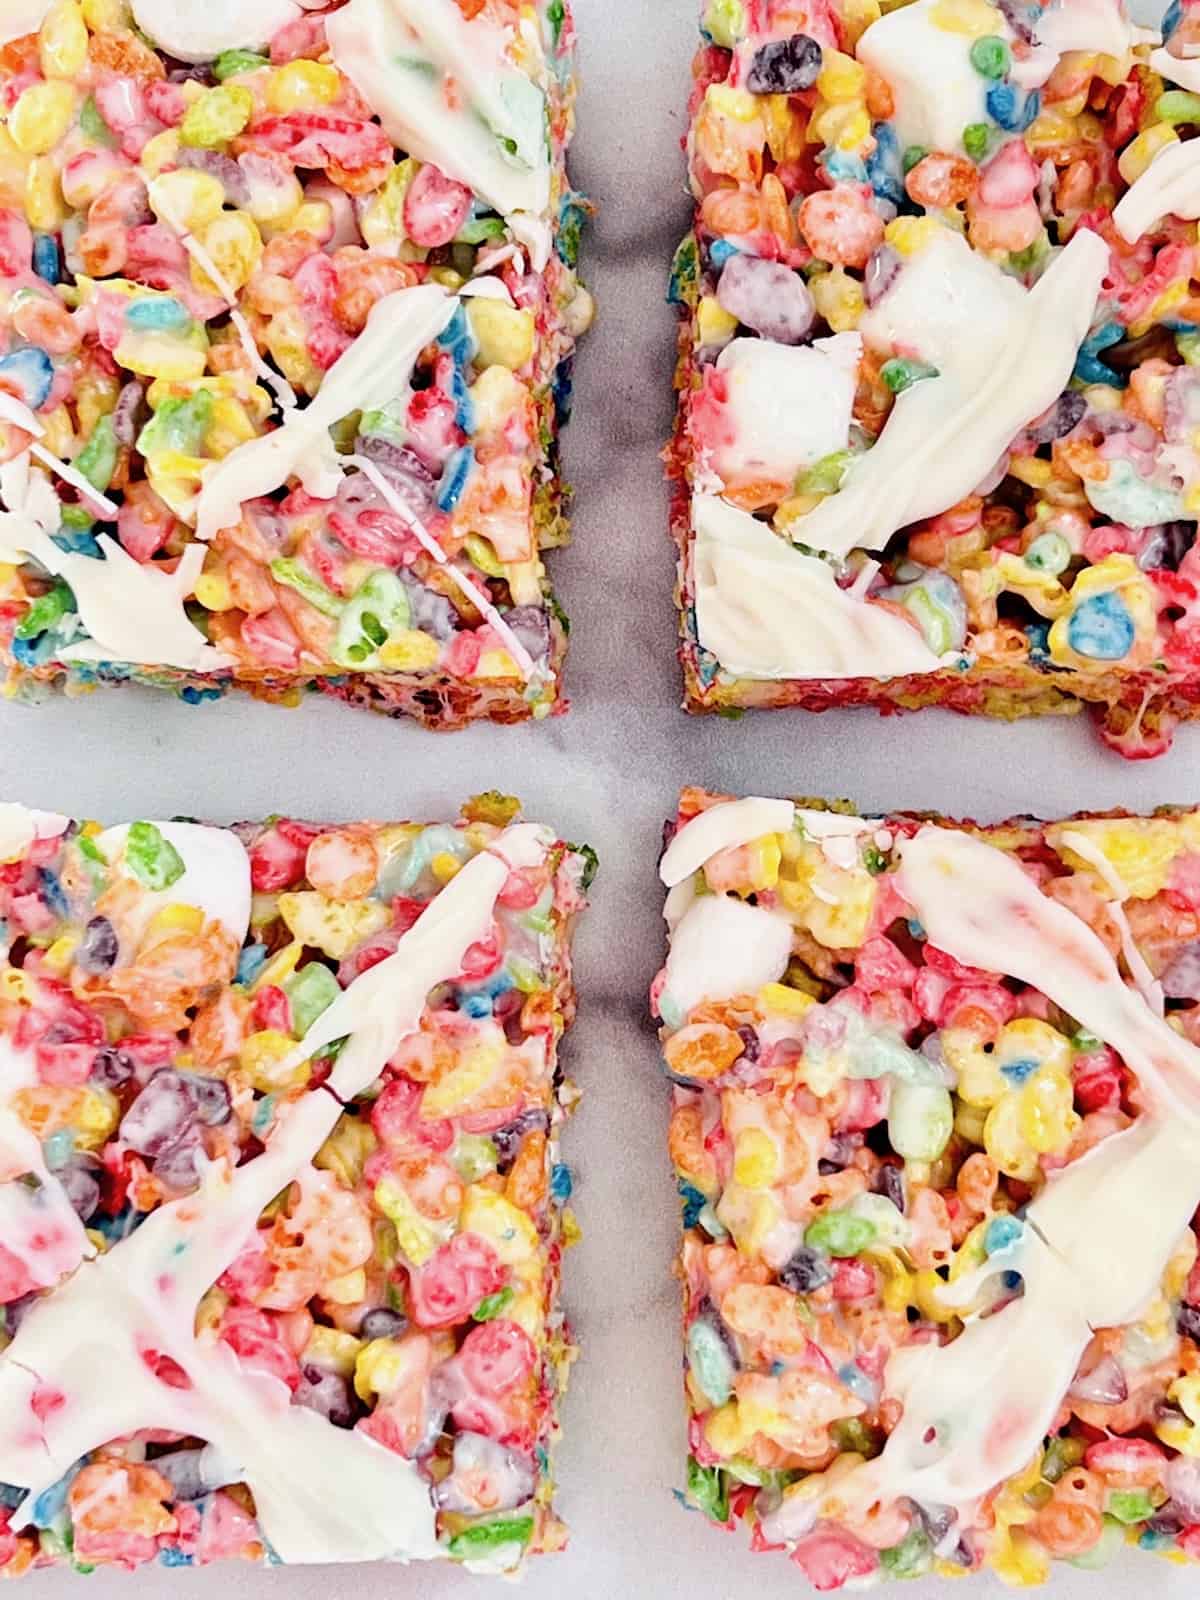
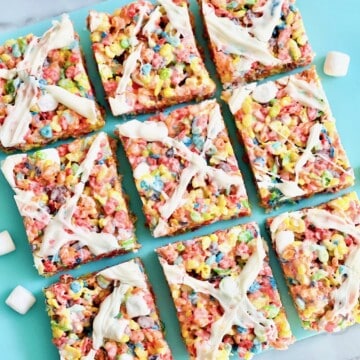
Once the vanilla drizzle is cool and set, it is time to cut the marshmallow & cereal mixture into squares. Cut the Fruity Pebble treats into 15 squares.
Look at the beautiful bright colors in each cereal treat. Each bite is chewy & fruity like my recipe for Gumdrop Nougat. The melting wafers are the final touch on top. Delish!
Fruity Pebble Treats in 8x8 Pan
If you want a smaller batch of fruity pebble marshmallow treats, these amounts work in an 8x8 square baking dish. This will yield 9 large squares.
- Salted Butter - 4 tablespoons
- Mini Marshmallows - 10-ounce bag
- Fruity Pebbles - 6 cups
If drizzling with the melted candy melts, use only ⅓ cup. Follow the stovetop instructions in the recipe card. Or make using the microwave instructions below.
Top Tips
All of these great tips are shared in the recipe. But these are so good and important they are worth mentioning again so you don't miss them.
- Use mini marshmallows, they melt quicker & are easier to melt.
- Do NOT press or smash the treats into the pan.
- Optional - add additional mini marshmallows just before placing them into the baking pan to cool.
- Optional - melt white candy melts & drizzle over the top & let cool before cutting.
Microwave Instructions
If you wish to make any kind of marshmallow cereal treats without the stove, you can make them using your microwave. It is easy to make fruity pebble treats in the microwave with this alternate recipe.
You will need to use a large microwave-safe bowl for this recipe version. Make sure it is big enough to hold all the ingredients. Use the same ingredient amounts as listed in the recipe card & follow these steps.
- Melt - add the diced butter and mini marshmallows to the large microwave-safe bowl; microwave on high for 30 seconds.
- Stir & repeat - using a silicone spoon or spatula, stir the mixture & microwave for an additional 30 seconds. Press down on the marshmallows to help them collapse/melt & stir again. If not completely smooth, stir & microwave at 15-second intervals until ready.
- Fold - add the fruity pebbles and fold the cereal into the melted marshmallows until combined evenly.
- Spread - spread the mixture into the prepared baking pan. Gently spread them using a silicone spoon or spatula so they are in an even layer. Do not press down hard or smash the mixture.
- Cool & Cut - cool for 30-45 minutes so they are set. Cut into 15 squares & enjoy.
OPTIONAL - microwave the candy melts in a microwave-safe bowl for 30 seconds. Stir to melt. If not smooth, stir & microwave at 15-second intervals until smooth. Drizzle over the tops of the cereal bars and let set as instructed above.
Equipment
The right ingredients, supplies, & equipment help recipes taste amazing & turn out well. Here are recommendations for products that are needed for making this Fruity Pebbles Cereal Bars recipe. Shop this recipe & buy these top-rated items today.


The Short Order Cook participates in the Amazon Services LLC Associates Program. As an Amazon Associate, I earn from qualifying purchases. If you click on a link and make a purchase, I may earn a small commission on the sale at no additional cost to you. This helps with the costs of running the blog. Thank you!
Storage
Marshmallow & cereal treats store very well. Simply place plastic wrap over the baking dish to keep them fresh. Store on the counter or in your cupboard in a cool dry place for up to 3 days.
You can also transfer cut squares, separated by parchment paper, to a container with a tight-fitting lid. This makes it easy to make them ahead of time & travel with them. So make them the day before you head to a potluck, picnic, or BBQ.
I do not recommend freezing Fruity Pebble Cereal Bars or any Rice Krispies treats.
FAQ
Here are answers to some common questions. I hope you find what you need but if not, you are always welcome to send me a comment below and I will get back to you.
According to the celiac.com website, they are gluten-free. So if you have sensitivity (like me) or have celiac disease, this recipe can be enjoyed safely.
First off, use mini marshmallows. Do not use large ones or marshmallow creme/fluff. I recommend using the Jet-Puffed brand since I find it just melts smoother & we like the "fresher taste". But any store brand will do.
Fruity Pebbles Cereal Bars
Equipment
- 9x13 baking dish
- parchment paper or cooking spray
- silicone spatula/spoon
Ingredients
- 6 tablespoons salted butter
- 15 ounce mini marshmallows 1 ½ bags typically
- 9 cups Fruity Pebbles cereal
- ¾ cup white vanilla melting wafer optional
- 1 ½ cups additional mini marshmallows optional
Instructions
- Gather the ingredients & equipment needed to make this recipe.
- Line a 9x13 baking dish with parchment paper or spray with cooking spray.
- Melt the salted butter in the large pot on the stove over medium heat.
- Once melted, add the mini marshmallows. Stir and cook until the marshmallow is melted.
- Dump the Fruity Pebbles cereal into the marshmallow mix. Fold to combine. Add optional mini marshmallows at this time.
- Spoon the mixture into the prepared baking dish. Gently spread it evenly in the pan. Press down lightly to make the mixture even and flat. DO NOT press or smash it down.
- While they are setting in the pan, time to melt the candy wafers.
- In a small microwave-safe bowl, add the white candy melts. Microwave on High for 20-second intervals. Stir between microwaving. Repeat until the candy wafers are smooth and melted.
- Drizzle the melted white candy mixture in a zigzag or any pattern over the Fruity Pebbles in the pan. Let the cereal bars cool for 30 minutes so they can set.
- Cut into 15 squares once set & firm.
Notes
- Store for up to 5 days in a cool dry place such as cupboard or pantry.
Fabiola says
This is the best recipe. I tried making these by using the regular rice crispies treat recipe and they were dry and not at all chewy. This recipe is so much BETTER! The extra marshmallow makes all the difference and this is my go to recipe for any cereal treat from now on.
Angela says
Extra "marshmallowy" is the way to go! I am so glad you love this recipe even more than what is on the box.