
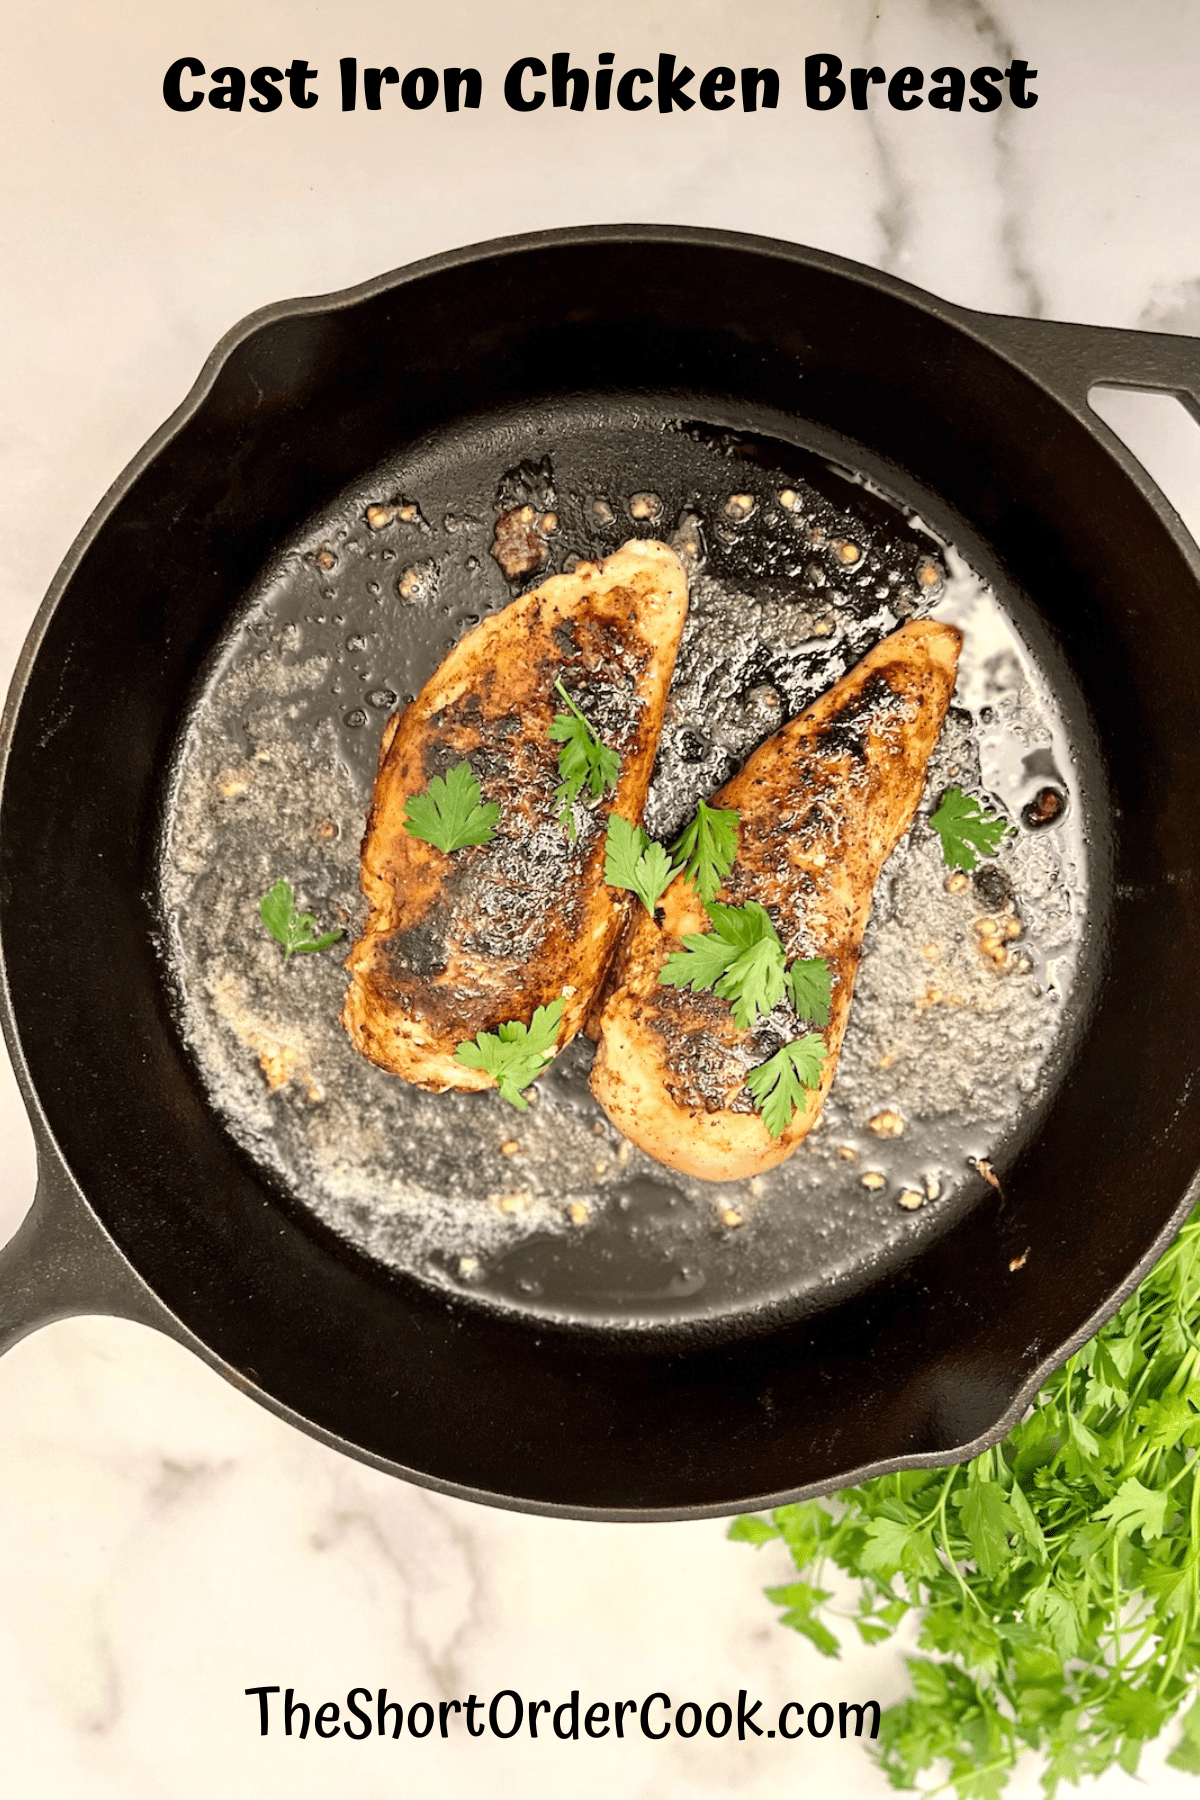
For the juiciest Cast Iron Skillet Chicken Breast, this easy recipe will become your go-to for weeknight dinners. This simple recipe creates a flavorful crust on the outside while ensuring the inside is moist & tender.
Why this Cast Iron Chicken Skillet Recipe is the BEST: In just a few simple steps I will teach you how to make succulent boneless skinless chicken breasts on the stovetop - foolproof & delicious every time.
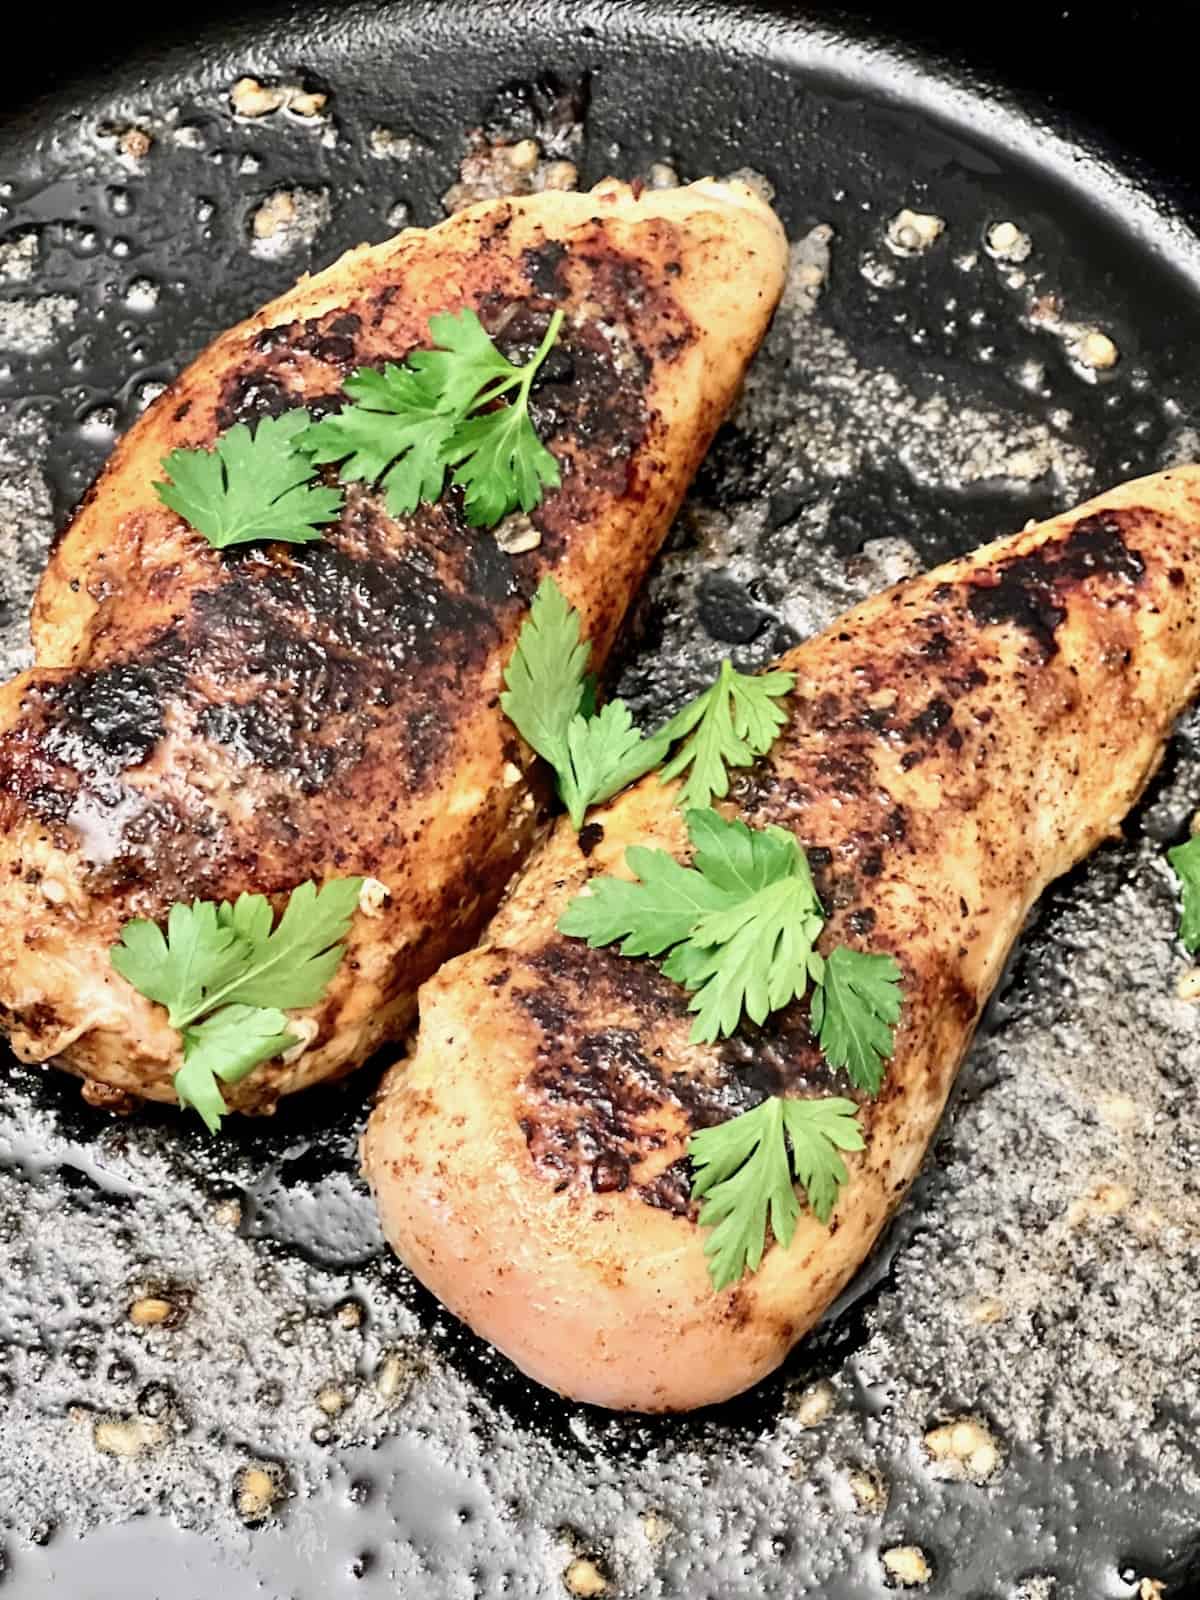
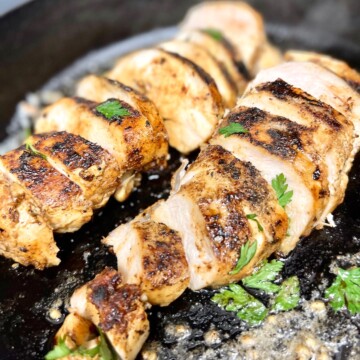
This is an easy one-pan recipe perfect for dinner any day of the week. If you are like me, you love cooking with your cast iron - and look how juicy that meat is!
You can make just about anything in a skillet, from great dinners like Zucchini & Garbanzo Bean Curry to sides like Blue Cheese & Bacon Brussels Sprouts to desserts as good as my recipe for Old-Fashioned Strawberry Peach Cobbler. So get out your cast iron skillet & let's cook!
Jump to:
- Why the Cast Iron Skillet is Best for Cooking Chicken Breasts?
- Ingredients for Cast Iron Chicken Breasts
- How to Cook Chicken Breasts in a Cast Iron Skillet
- Substitutions & Variations
- Recipe Tips & Behind the Scenes
- Storing & Reheating
- Equipment
- FAQ
- Cast Iron Skillet Chicken Breast
- More Skillet Chicken Recipes
- Food safety
Why the Cast Iron Skillet is Best for Cooking Chicken Breasts?
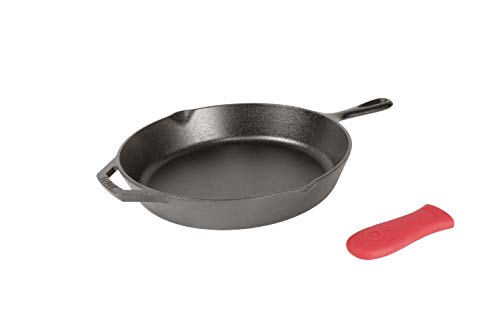
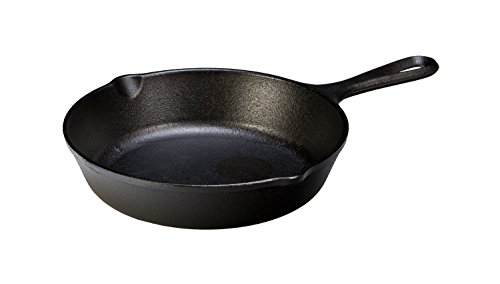
There are several reasons why I recommend pan-searing chicken breasts in a cast iron skillet. I am using a 12" Lodge Cast Iron Skillet. I have had it for decades & I still love it. Any 8", 10", or 12" skillet will work for this but one with a heavy bottom is best.
Here is why cooking any piece or cut of chicken in cast iron is the best.
- Cast Iron retains heat better than any type of pan or skillet which ensures even cooking.
- A well-seasoned cast iron pan is nonstick without chemicals, sprays, or cooking in lots of oil.
- The high heat in a cast iron skillet helps create a crust on the exterior of the chicken which seals in the juices of the meat - plus that crust is beautiful with great flavor and texture.
- Cast iron pans are easy to clean & last a lifetime - and beyond!
Ingredients for Cast Iron Chicken Breasts
This recipe is quick & easy with a short list of ingredients. It takes only 4 fresh ingredients plus a blend of spices for the most delicious pan-cooked chicken ever.
There is no oil which makes it also low-fat. With just a bit of butter & fresh garlic for a quick pan sauce that also bastes the chicken for amazing flavor. The chicken remains healthy & part of a skinny low-carb/keto diet.
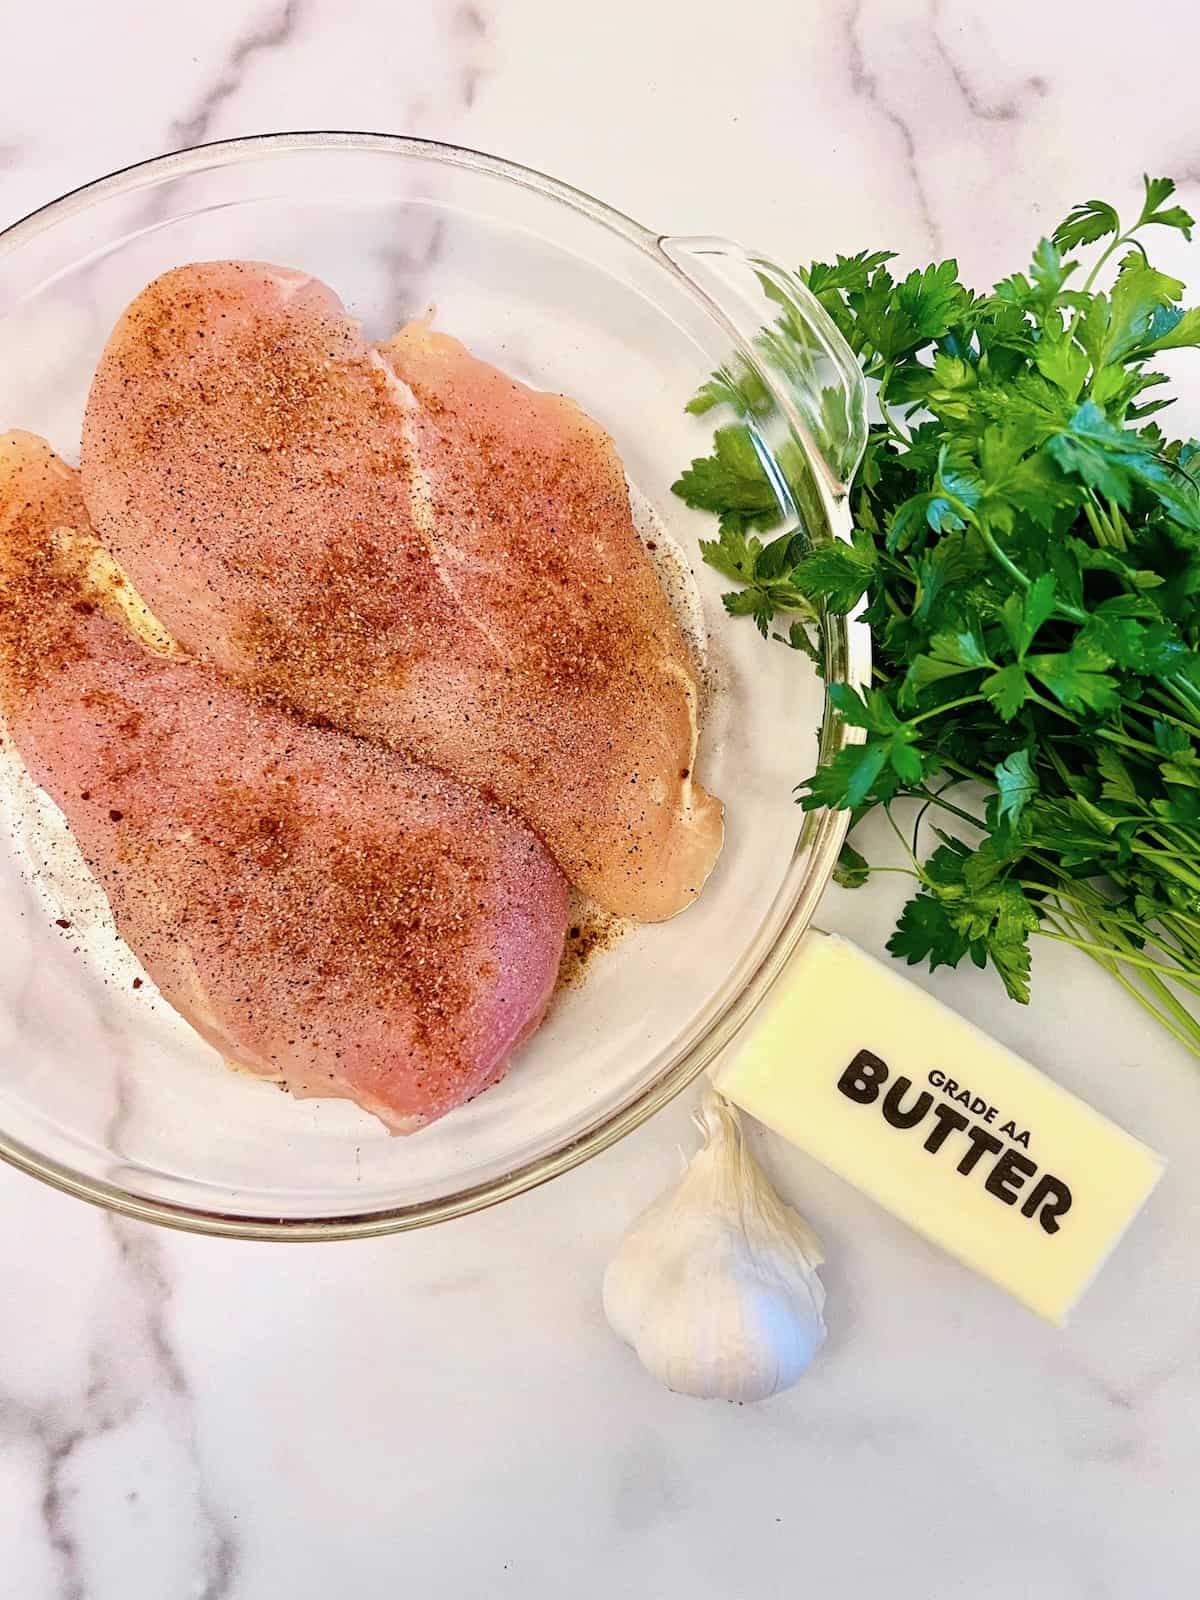
- Boneless Skinless Chicken Breasts - for quick even cooking compared to bone-in breasts.
- Salted Butter - for the pan sauce.
- Fresh Garlic - added flavor.
- Fresh Flat Leaf Parsley - fresh herbs add brightness & color.
- Spices - salt, black pepper, paprika, & onion powder
See the recipe card for quantities.
How to Cook Chicken Breasts in a Cast Iron Skillet
For juicy cast iron skillet chicken breast, this recipe is fantastic. This one-pan meal is quick, perfect for busy weeknight dinners.
Here are the easy steps for cooking seasoned chicken breasts in a cast iron skillet on the stove.
- Prep the Skillet & Chicken
- Cook the Chicken Breasts
- Check if Done
- Make the Garlic Butter Sauce
- Check if Done
- Sauce & Serve
1 - Prep the Skillet & Chicken
It is best to cook meat when it is close to room temperature. This is true, especially for steaks and chicken. About 20-30 minutes before you want to begin cooking, take the chicken from the refrigerator.
Open the package, pat the chicken dry on all sides, & set it on the kitchen counter. Once it is almost at room temperature, time to season it and get that skillet hot.
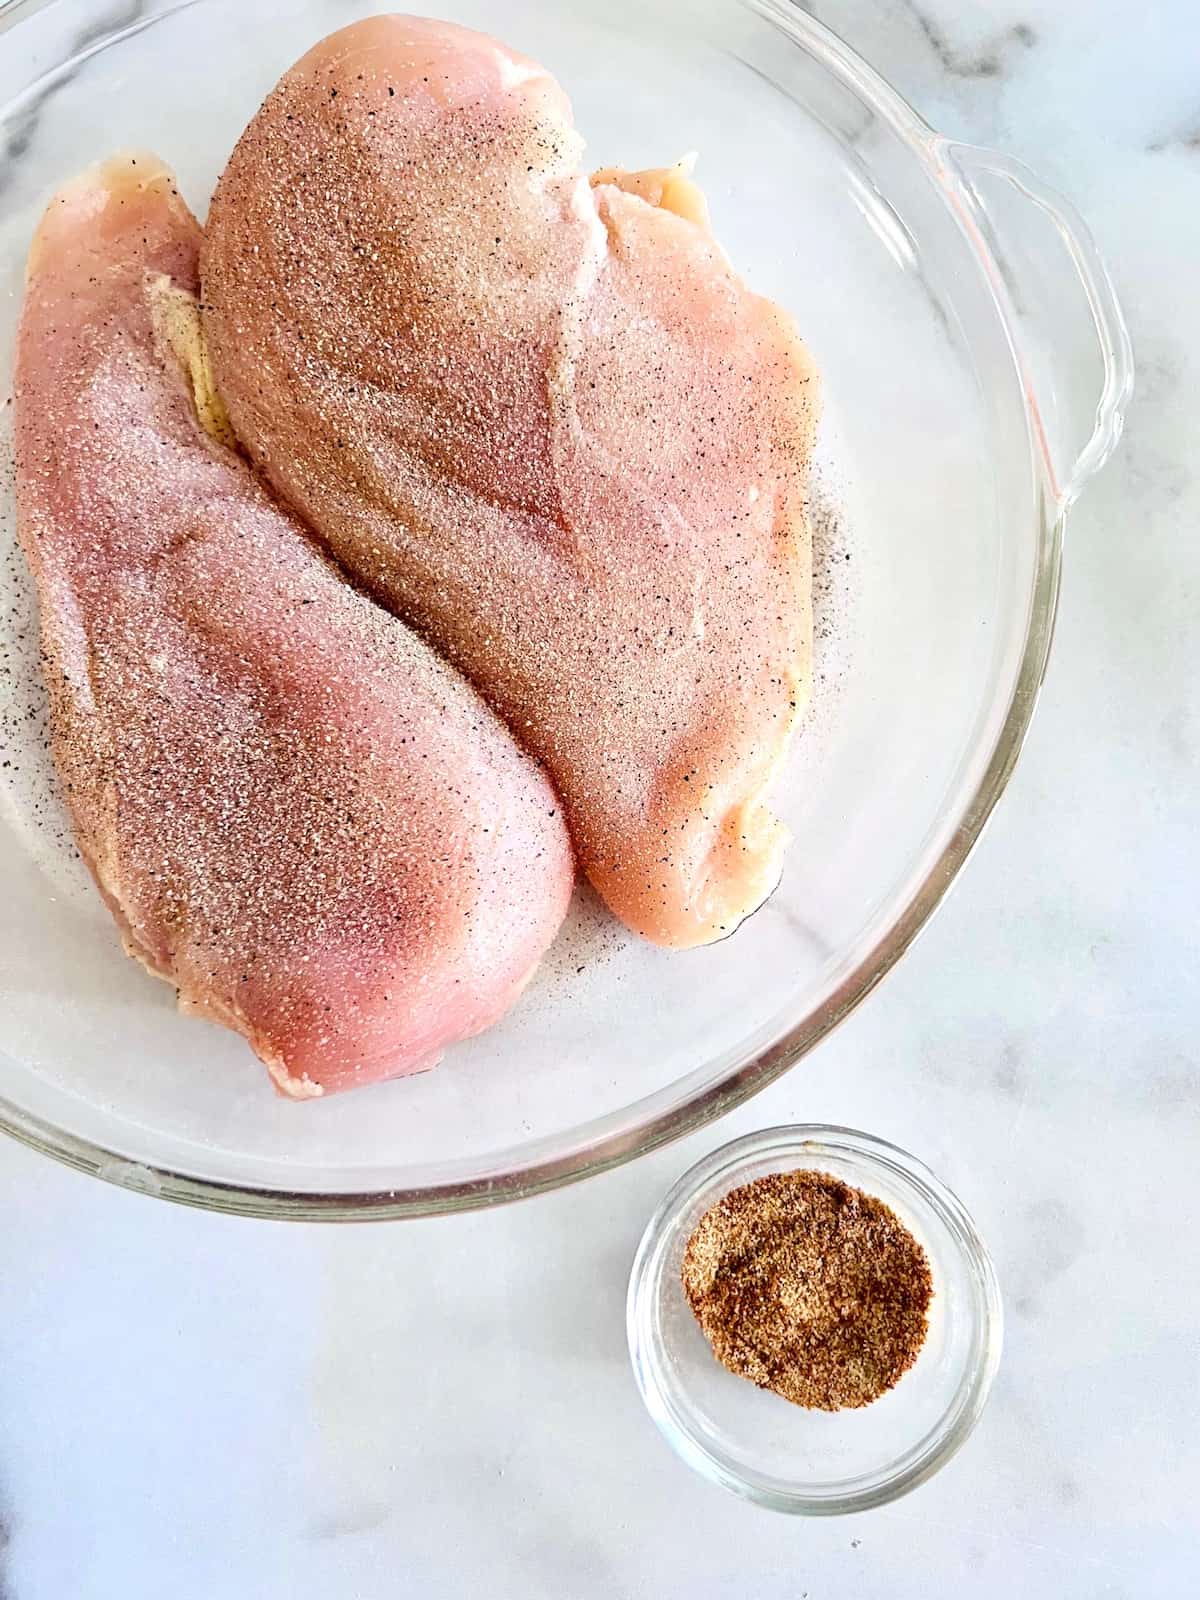
Combine the spices in a small bowl and mix. Sprinkle it liberally on both sides of each piece of chicken.
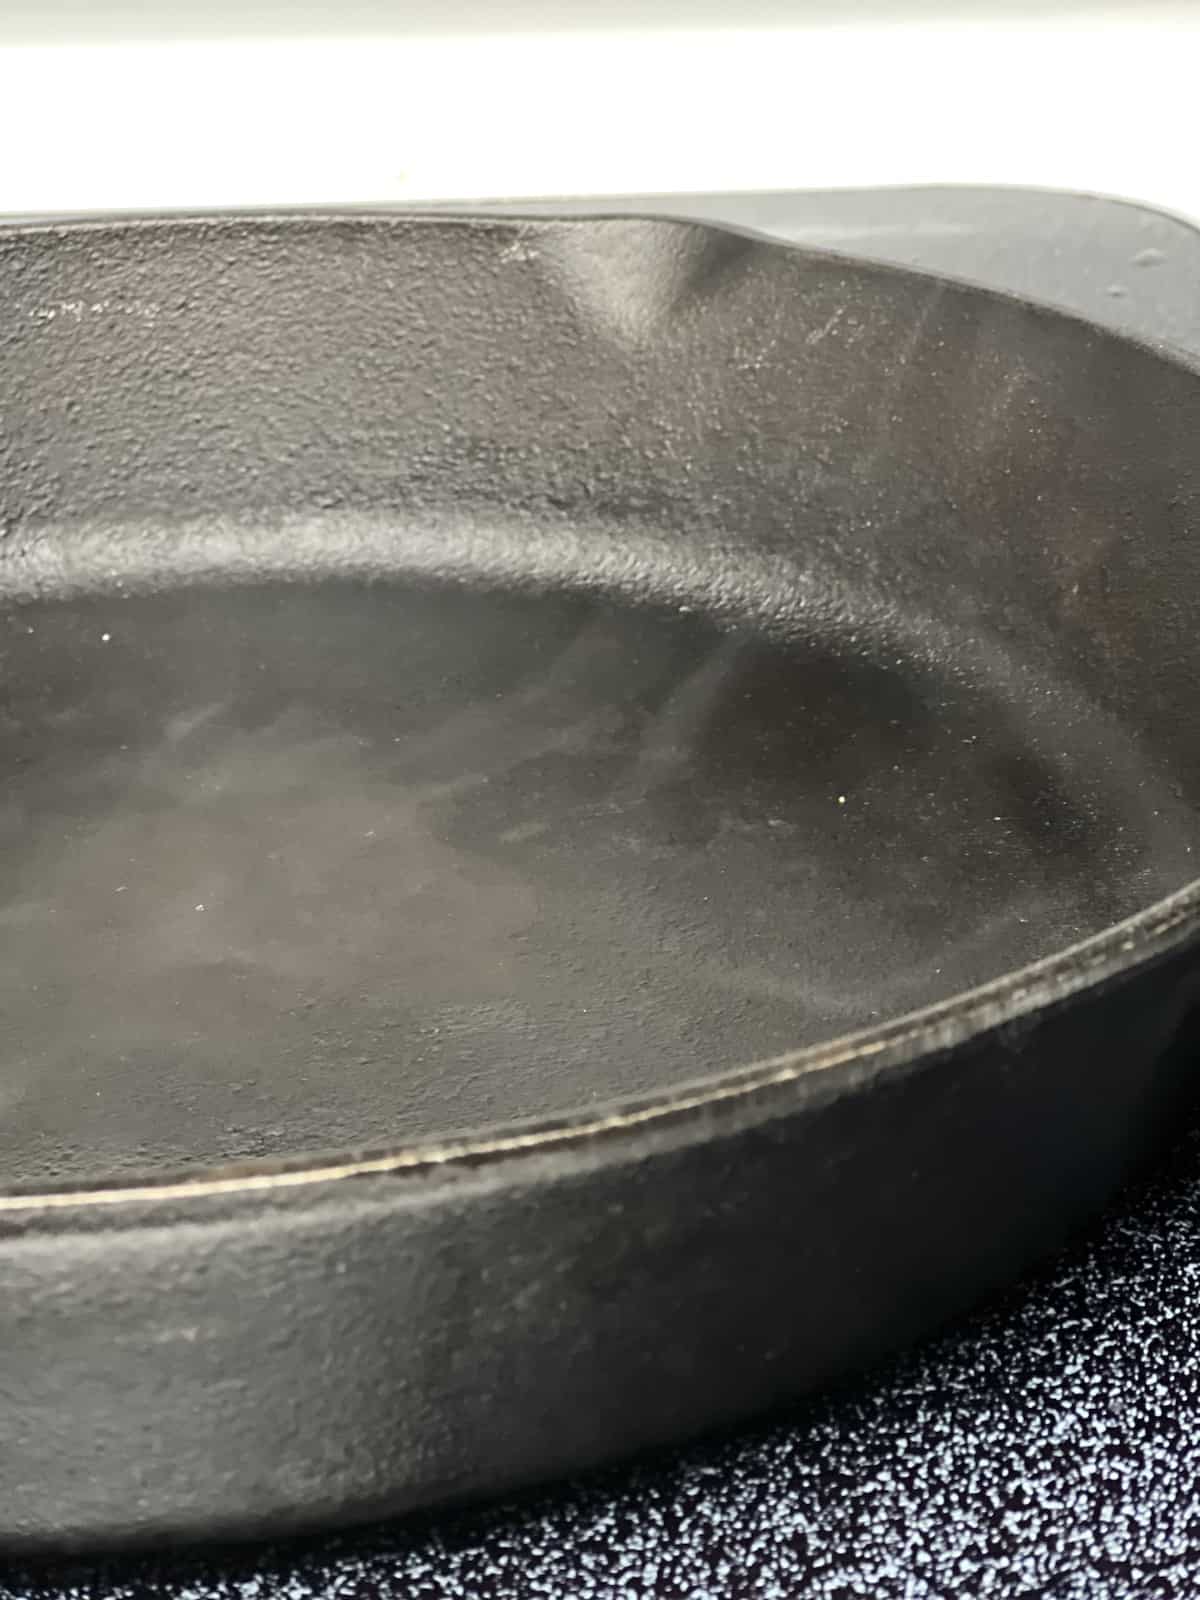
Place the empty cast iron skillet on the stove. Turn it on medium-high for about 3-5 minutes.
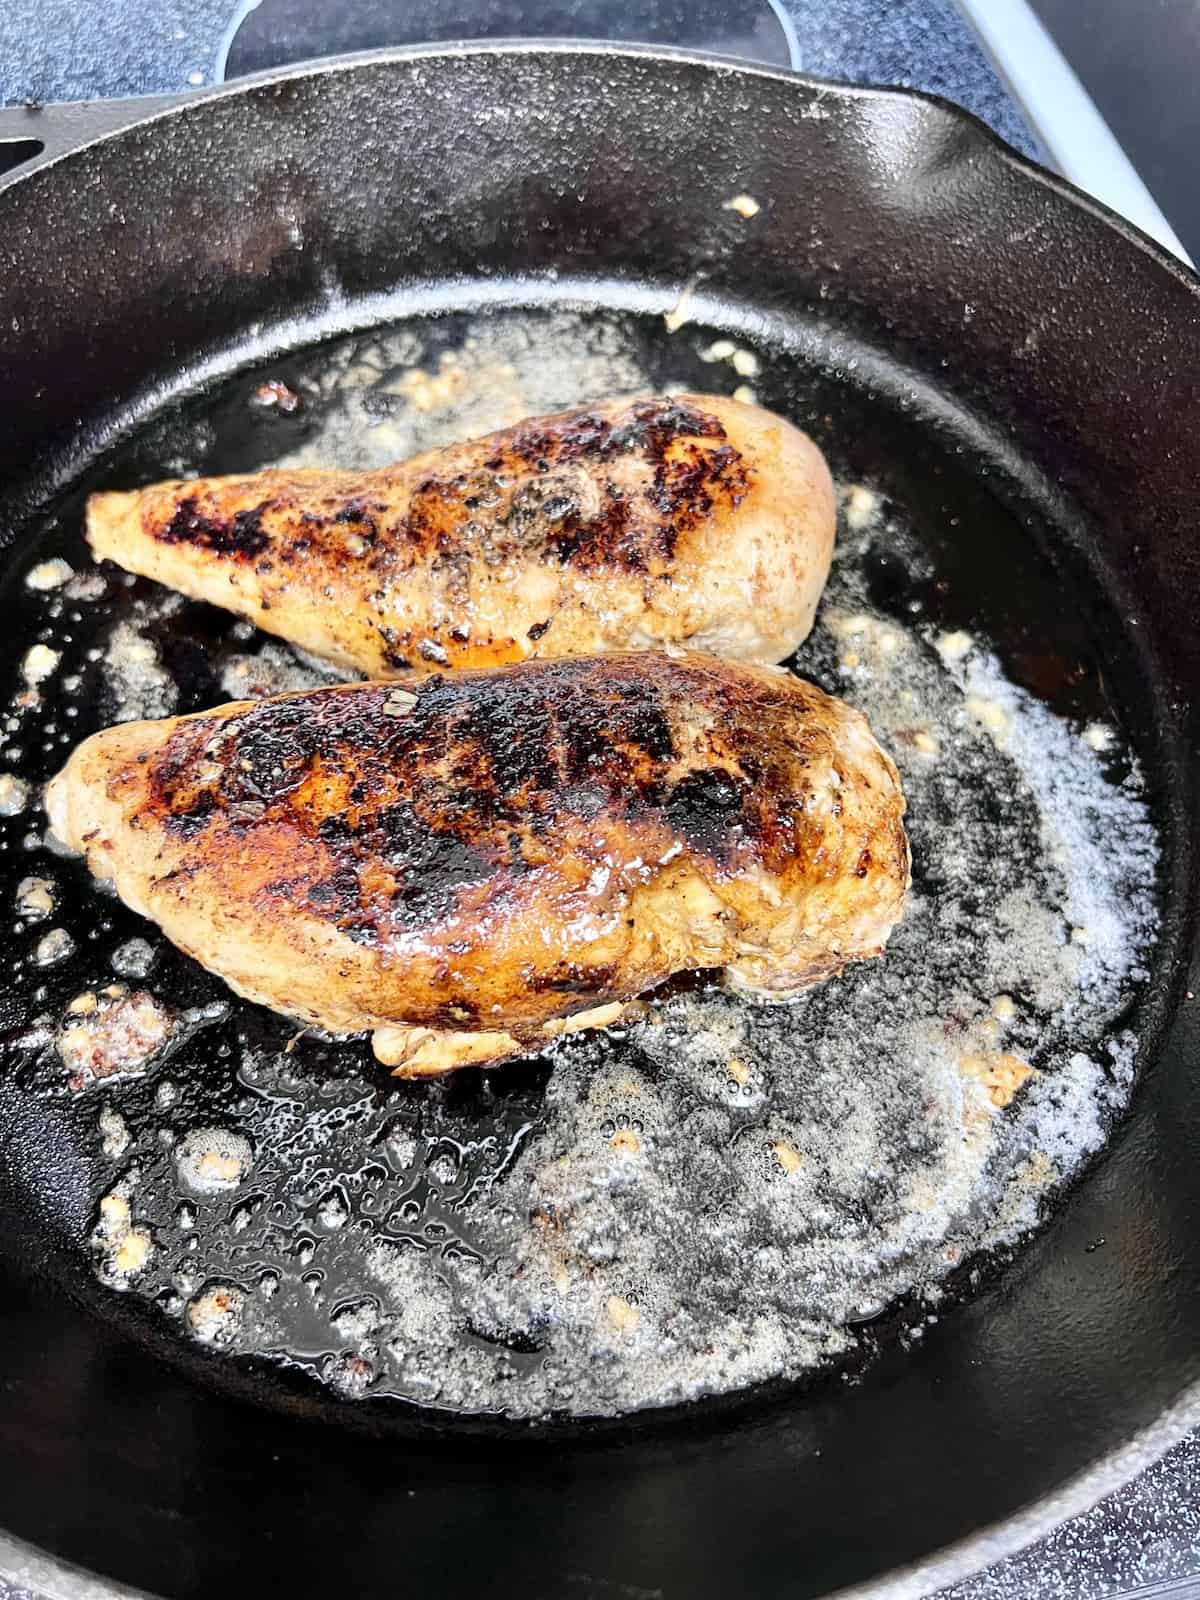
2 - Cook the Chicken Breasts
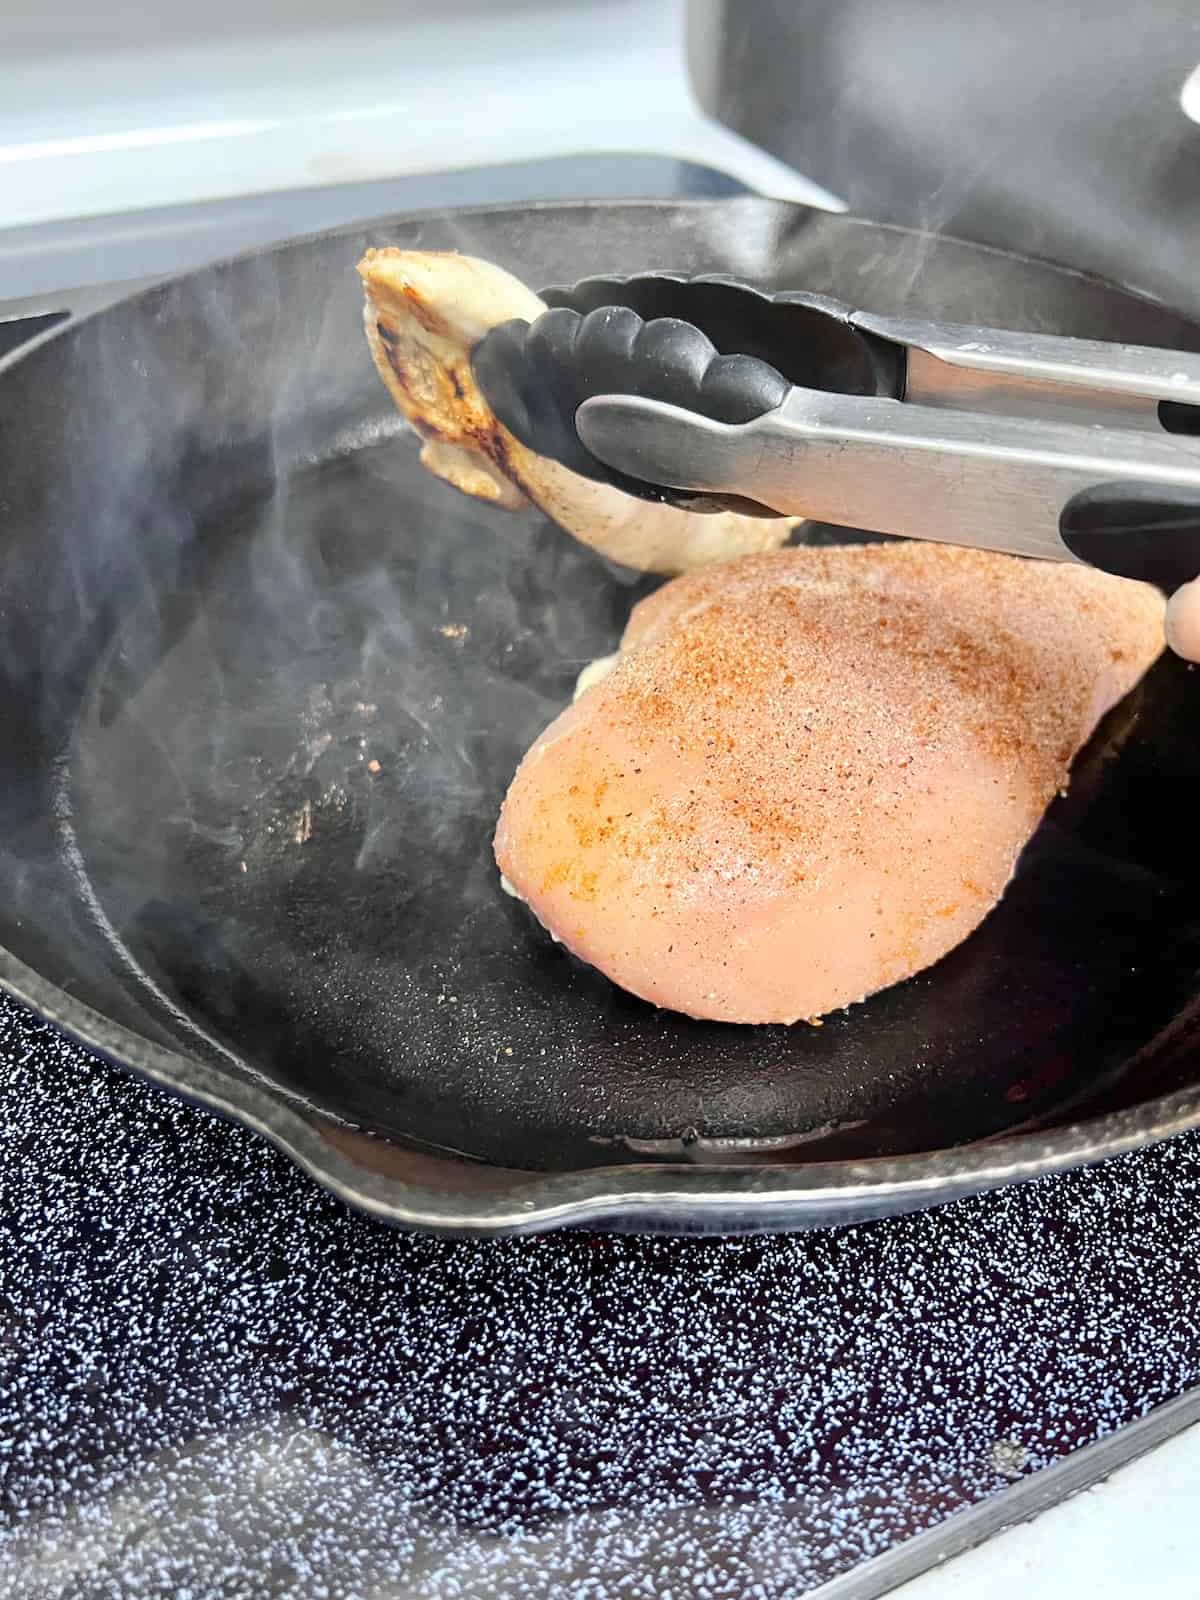
Once the pan is good and hot, it is time to start cooking. Gently place each chicken breast into the hot skillet. Then leave it alone. Do not flip it, poke it, or move it.
You want the exterior to sear and brown so it creates a crust. The only way to do that is to let it cook without touching it. Let the chicken cook for 4-5 minutes on the first side.
It is ready to flip when using a set of tongs to lift it from the pan it can be done easily. If the chicken releases from the hot skillet without sticking or tearing, it is ready to turn.
Flip the chicken over when it is golden and no longer sticks to the pan.
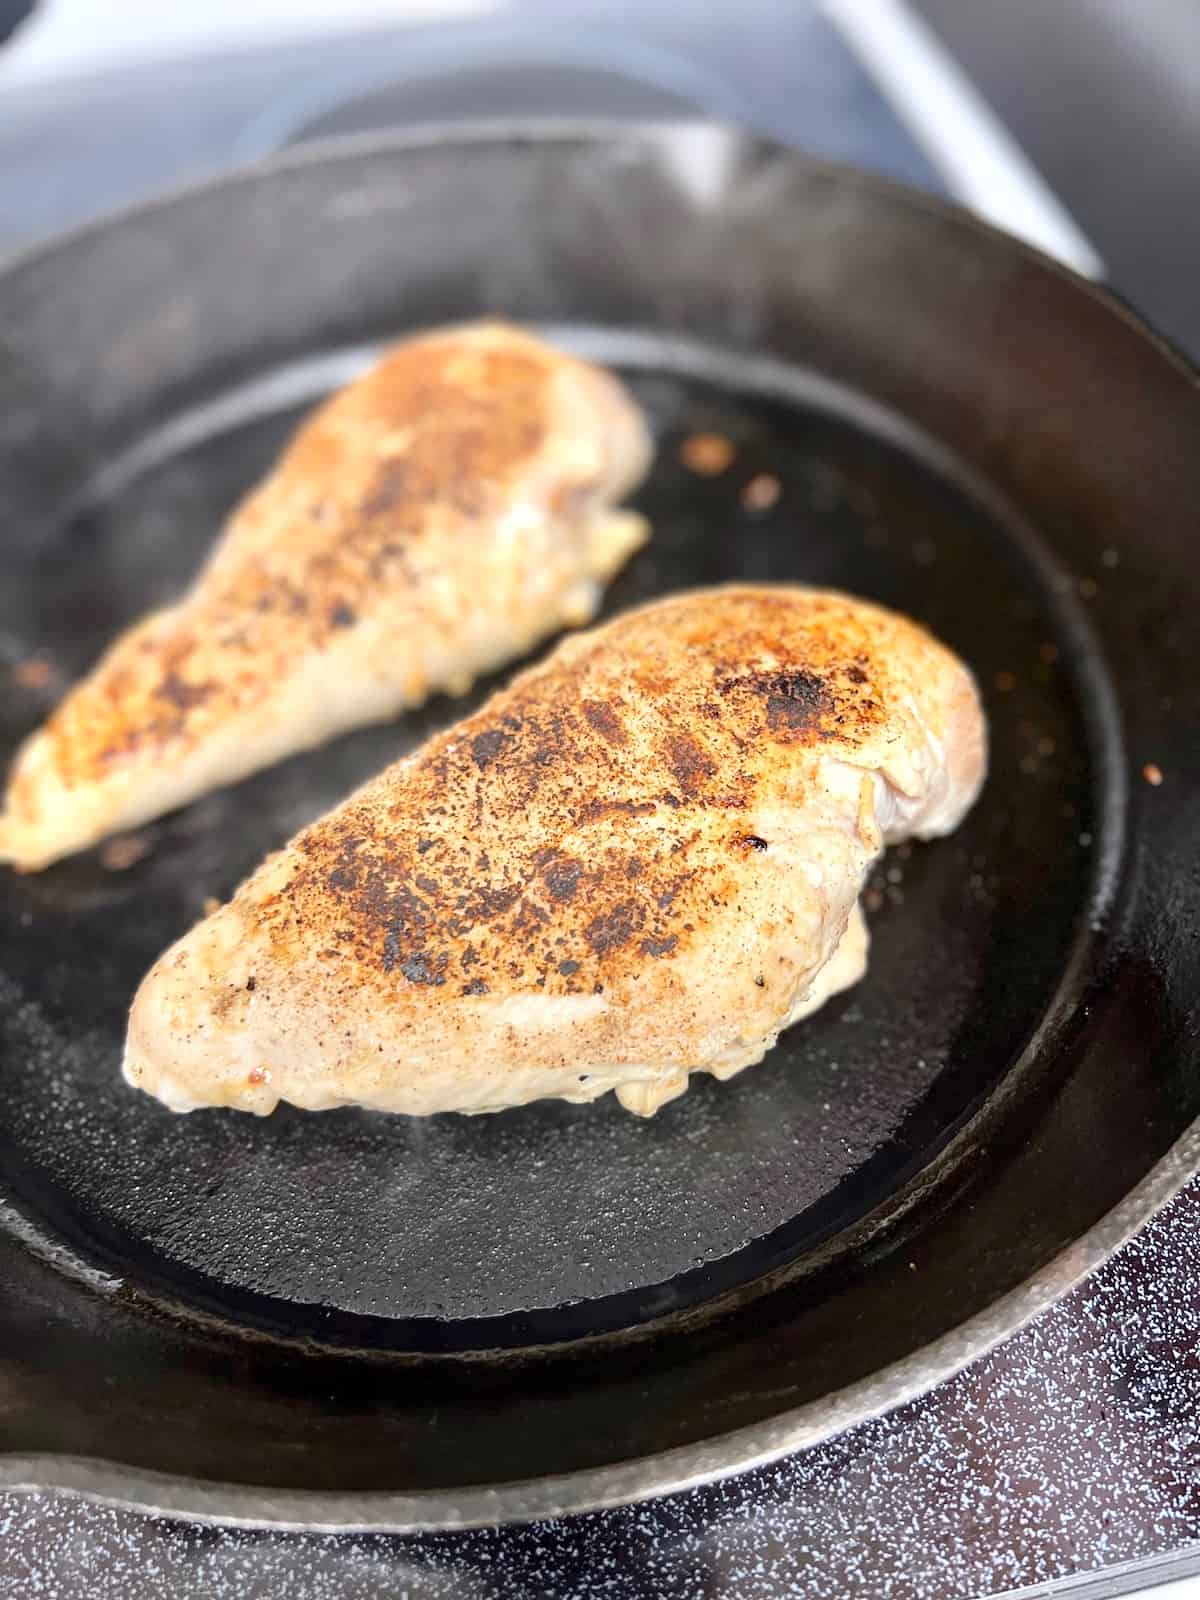
Continue cooking on the other side for 5 more minutes.
Once both sides of the chicken have cooked on high heat, turn the skillet down to medium-low heat. The crust is done and now it is time to cook it on a lower heat to get the center cooked.
3 - Check if Done
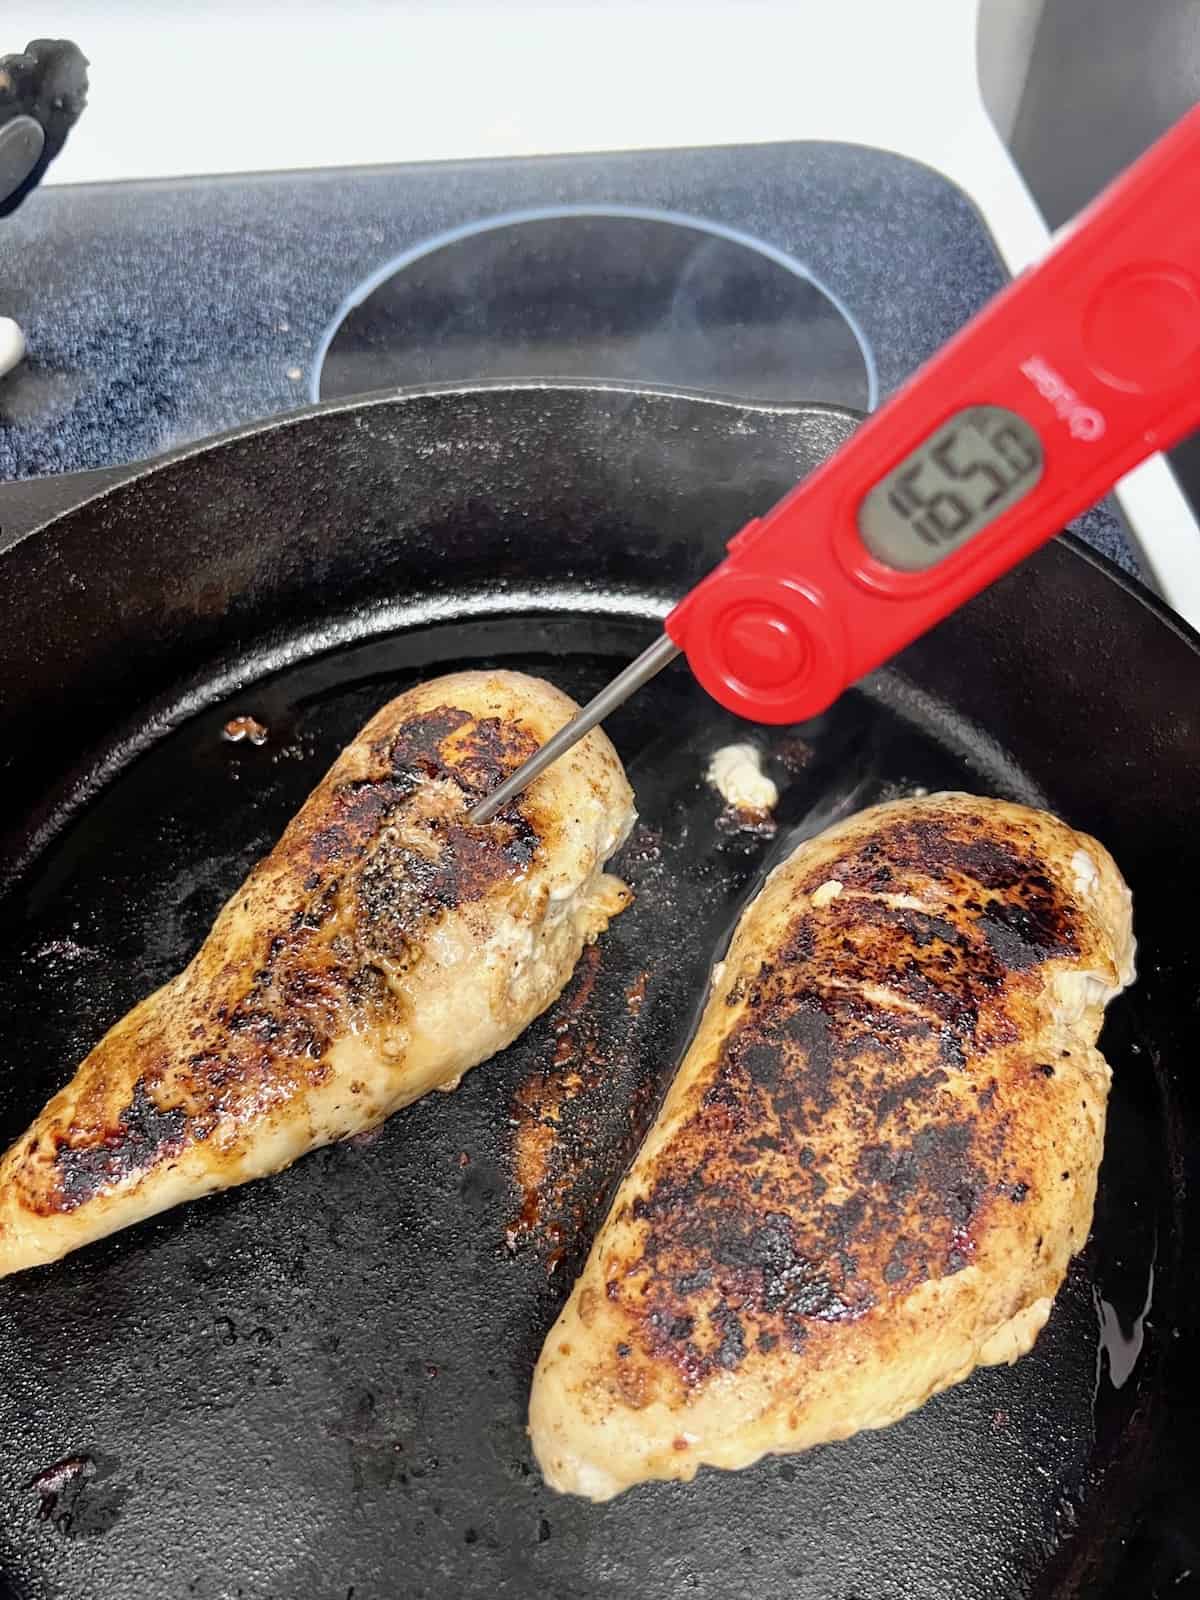
After both sides are seared, the chicken is cooked slowly over a lower heat. I cooked my chicken breasts on 4 in my Lodge cast iron skillet. I cooked it for 10 minutes more on each side.
After 20 minutes of low-heat cooking, start checking to see if it is done. Use an instant-read meat thermometer to check to see if it is 165°F in the thickest part of the chicken breast.
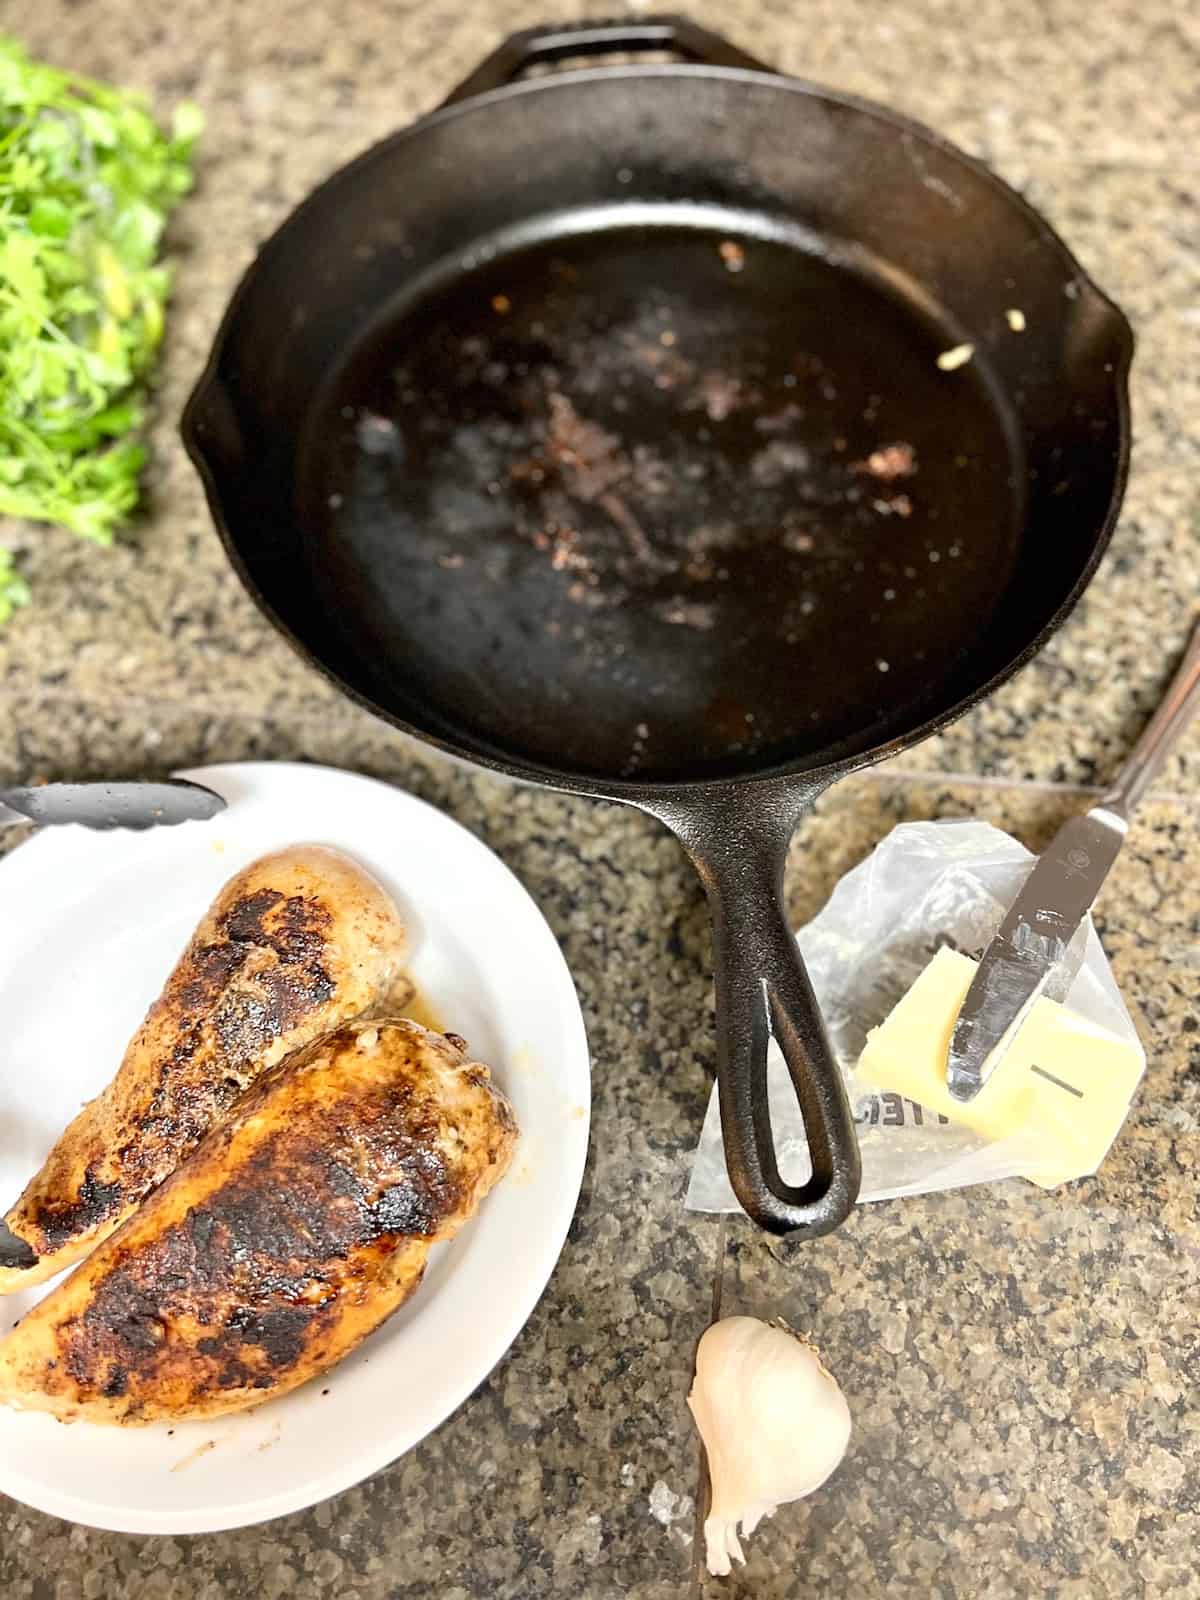
4 - Make the Garlic Butter Sauce
Once the chicken is done cooking, it is time to make the pan sauce. Turn the stove off and remove the pan from the heat. Also, use tongs to remove the chicken from the pan and set it on a plate to the side.
PLEASE NOTE: each piece of chicken will vary in size, shape, & weight. This recipe is a guide to estimate how long it will take to pan-cook one pound or 2 boneless skinless chicken breasts. Always cook until the center registers 165° on a meat thermometer.
For the final yummy step, make a butter garlic sauce. It will only make a small amount but it adds a pop of flavor & moisture that brings this whole dish to a new level.
Place the hot pan back on the stove. The residual heat should still be in the skillet. If not, turn it on to low heat. Add the butter to the hot pan and let it melt.
Add chopped garlic and stir to brown slightly. As soon as the garlic is aromatic and the butter just starts to brown, the sauce is ready.
6 - Sauce & Serve
Add the chicken breasts back to the pan. Flip to coat all sides.
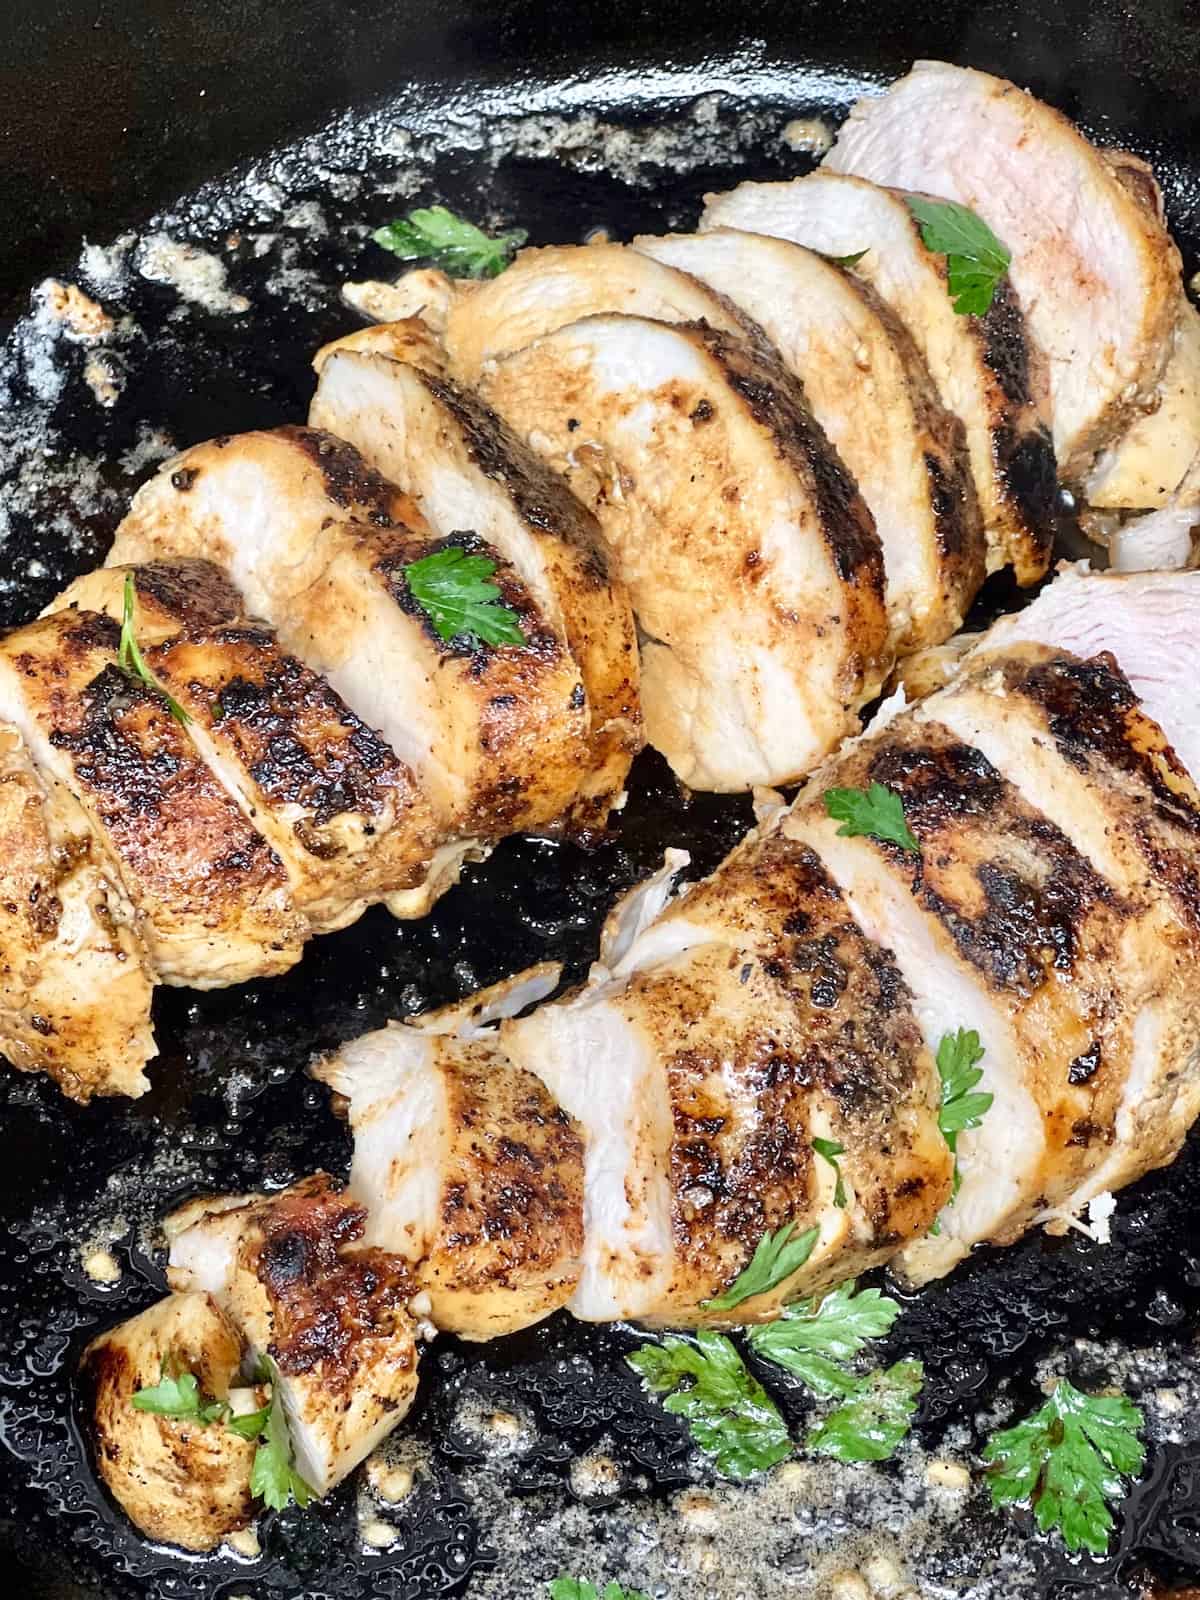
Once the chicken and butter sauce is done, it is time to serve the cast iron chicken breasts. Use tongs and plate the chicken.
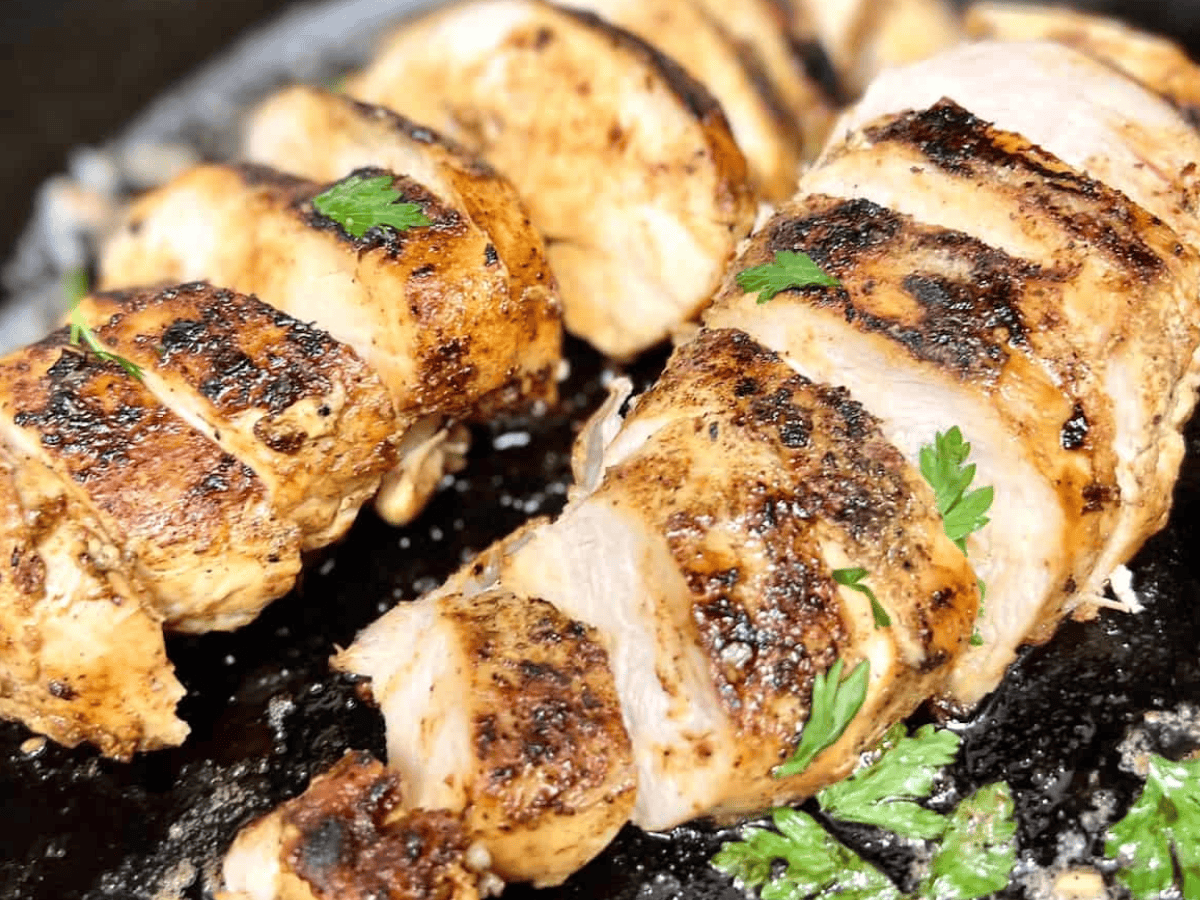
These two big pieces of chicken are enough to feed 4 people. I recommend slicing it to enjoy. I like to slice it and then add it back to the pan to get every drop of the garlic butter. Top with fresh parsley leaves.
Substitutions & Variations
This is such a simple recipe that does not need any changes or alternates. This recipe uses whole breasts, if you want a skillet recipe for tenders try my Cheesy Jalapeno Chicken recipe. But of you want to make it your own or have dietary restrictions, try some of these choices.
- Boneless Skinless Chicken Breast - instead of a chicken breast, you can use this recipe for boneless skinless chicken thighs - cooking time to reach 165° will be shorter.
- Shallots - use a combination of garlic and shallots for even more flavor.
- Butter - instead of butter use olive oil for a dairy-free recipe.
- Spicy - Add ½ teaspoon of cayenne pepper to the spices.
- Low-Sodium - instead of the spice blend in this recipe, use your favorite low or no-sodium seasoning blend instead.
- Creamy Deluxe - double the amount of butter and garlic for more sauce & add a splash of cream.
This recipe is already low-carb, keto, gluten-free, & diabetic-friendly.
Recipe Tips & Behind the Scenes
Here's my recipe for success - including what I learned when testing, fun stories, recipe history, and more.
- #1 Tip - Let the chicken come to room temperature a bit & always preheat the pan.
- #2 Tip - DO NOT flip the chicken until it releases easily from the pan.
- Ensure the chicken is done & 165°F internal temperature.
- Serve as soon as you slice it.
- Why use a cast iron skillet? It has superior heat retention and even cooking plus naturally nonstick - a difference vs stainless steel pan.
- I taught this dozens of times in cooking classes during my personal chef days & I cannot count how many times I got a BIG "Thank you!"
Storing & Reheating
Leftover cooked chicken will keep for up to 3 days in the refrigerator or 30 days in the freezer. Place cooled chicken in an air-tight container or Ziploc bag to store in the refrigerator or freezer.
Reheat in a preheated oven or toaster oven at 400°F for 5-10 minutes. Or serve leftovers cold diced up in my recipe for Arugula Salad with Leftover Chicken.
What to Serve with Cast Iron Skillet Chicken : This is a great Sunday Supper in fall or winter when you aren't outside grilling. It goes great with Chicken Broth Rice & a simple vegetable like my recipe for Air Fryer Green Beans.

Equipment
The most important piece of kitchen equipment for this chicken breast recipe is a good quality cast iron skillet. This inexpensive kitchen tool should be in every home kitchen. It is so versatile, easy to use, easy to clean, & lasts decades. Invest in a good quality pan and you will be rewarded with amazing food for a lifetime.

The Short Order Cook is a participant in the Amazon Services LLC Associates Program. As an Amazon Associate, I earn from qualifying purchases. If you click on a link and make a purchase, I may earn a small commission on the sale at no additional cost to you. This helps with the costs of running the blog. Thank you!

FAQ
Here are answers to some common questions. I hope you find what you need but if not, you are always welcome to send me a comment and I will get back to you.
A cast iron skillet that is seasoned, is naturally nonstick. No oil or sprays are needed when cooking in one. But you can do more to ensure your food releases easily when cooking.
The key to making chicken (or steak, pork, etc) that does NOT stick to your cast iron pan, is two important tips. Preheat the pan and bring the meat to room temperature! Easy, right?
This simple chicken recipe stores well for up to 3 days in the refrigerator. If you like to meal-plan, this chicken breast made in cast iron is for you. You can cook it, slice or dice it, & reheat it to enjoy it later.
It is great to add to salads, wraps, soups, & casseroles. Use it wherever you may use leftover rotisserie chicken. It is great in my Chicken & Cheese Keto Enchilada Recipe.
RECIPE NOTE: this recipe was originally published February 2023. It has been updated to include calorie & nutritional information, substitutions, additional photos, concise steps, and tips for republishing in 2025.
Cast Iron Skillet Chicken Breast
Equipment
- cast iron skillet Lodge or other brand - big enough to fit all your chicken breasts with space between (do not overcrowd the pan)
Ingredients
- 1 pound boneless skinless chicken breasts
- 2 tablespoons salted butter
- 3 garlic cloves minced
- 2 tablespoons fresh flat-leaf parsley chopped
Spice Mix
- 1 teaspoon salt
- ½ teaspoon black pepper
- ½ teaspoon paprika
- ½ teaspoon onion powder
Instructions
- Bring the chicken to room temperature for 20-30 minutes before cooking.
- In a small mixing bowl, add the 4 spice mix ingredients. Stir to combine.
- Pat the chicken dry and place it in a rimmed shallow dish. Sprinkle the spice mix on all surfaces of the chicken.
- Place the empty cast iron skillet on the stove. Turn it on medium-high for about 3-5 minutes to preheat.
- Once the pan is good and hot, it is time to start cooking. Gently place each chicken breast into the hot skillet. (do not over crowd the pan, you want space between each piece of chicken) Then leave it alone. Do not flip it, poke it, or move it.
- Let the chicken cook for 4-5 minutes on the first side.
- If the chicken releases from the hot skillet without sticking or tearing, it is ready to turn. Flip the chicken over when it is golden and no longer sticks to the pan.
- Continue cooking on the other side for 5 more minutes.
- Once both sides of the chicken have cooked on high heat, turn the skillet down to medium-low heat.
- Cook the chicken for an additional 10 minutes on each side.
- After 20 minutes of low-heat cooking, start checking to see if it is done. Use an instant-read meat thermometer to check to see if it is 165° in the thickest part of the chicken breast.
- Turn the stove off and remove the pan from the heat. Also, use tongs to remove the chicken from the pan and set it on a plate to the side.
- Place the hot pan back on the stove. The residual heat should still be in the skillet. If not, turn it on to low heat. Add the butter to the hot pan and let it melt. Add chopped garlic and stir to brown slightly.
- As soon as the garlic is aromatic and the butter just starts to brown, the sauce is ready. Add the chicken breasts back to the pan. Flip to coat all sides.
- Serving suggestion - slice and add back to the pan to coat with the garlic butter. Top with chopped fresh parsley.
Notes
- Store leftovers for 3 days in the refrigerator or up to 30 days in the freezer.
- Reheat leftovers in a warm oven or toaster oven at 400°F for 5-10 minutes.
- Do NOT overcrowd the pan so the chicken can cook evenly.
- Do NOT flip or move the chicken around until each side is ready / done cooking. Follow the recipe as is when it says it is not ready to flip until the chicken releases easily & is not sticking to the pan - trust the process.
- Use an internal read thermometer so you know when it reaches 165°F and is ready/safe to eat - otherwise you may overcook it making it dry & too well done.
Nutrition
More Skillet Chicken Recipes
Here are more great recipes for cooking chicken in a skillet. These are all easy to make & deliver a lot of wow! So for something tasty & cooked in one pan, these recipes are the best on the blog.
Food safety
Safe food handling techniques, practices, & habits are very important when cooking with raw meat & poultry. Follow these tips to ensure you have a clean kitchen & food that is delicious & safe to eat.
- Cook to a minimum temperature of 165 °F (74 °C).
- Do not use the same utensils on cooked food, that previously touched raw meat.
- Wash hands after touching raw meat.
- Don't let food sit out at room temperature for extended periods.
- Never leave cooking food unattended.
- Always have good ventilation when using a gas stove
See more guidelines at USDA.gov.
Maddie says
This recipe was very easy. I read all the information before cooking since I have never cooked meat in my cast iron pan. I am a nervous cook and I am glad I tried this recipe. I am excited to try the other chicken recipes you have for the cast iron. Thank you for making this easy to follow. The chicken was juicy.
Angela says
I am so happy to hear you found a new easy recipe to make & love. It is so simple and good, I agree.
Mariama says
Beautiful! Cast iron pots really make a massive difference to the taste and even more to the smell!
Angela says
I agree!
Helen at the Lazy Gastronome says
Thanks for sharing at the What's for Dinner party - hope your week has been going great!
Peggy says
I usually use my cast iron pan for cornbread only. I want to learn how to cook other things and this chicken seemed easy enough and gosh was it. I had 3 breasts in the package and one was bigger and took longer but all came out lovely. One question, can I use margarine if I don't have butter since I usually don't eat butter but have olio or lard.
Angela says
I am glad you found this recipe easy and to your liking. You can use margarine instead of butter.