
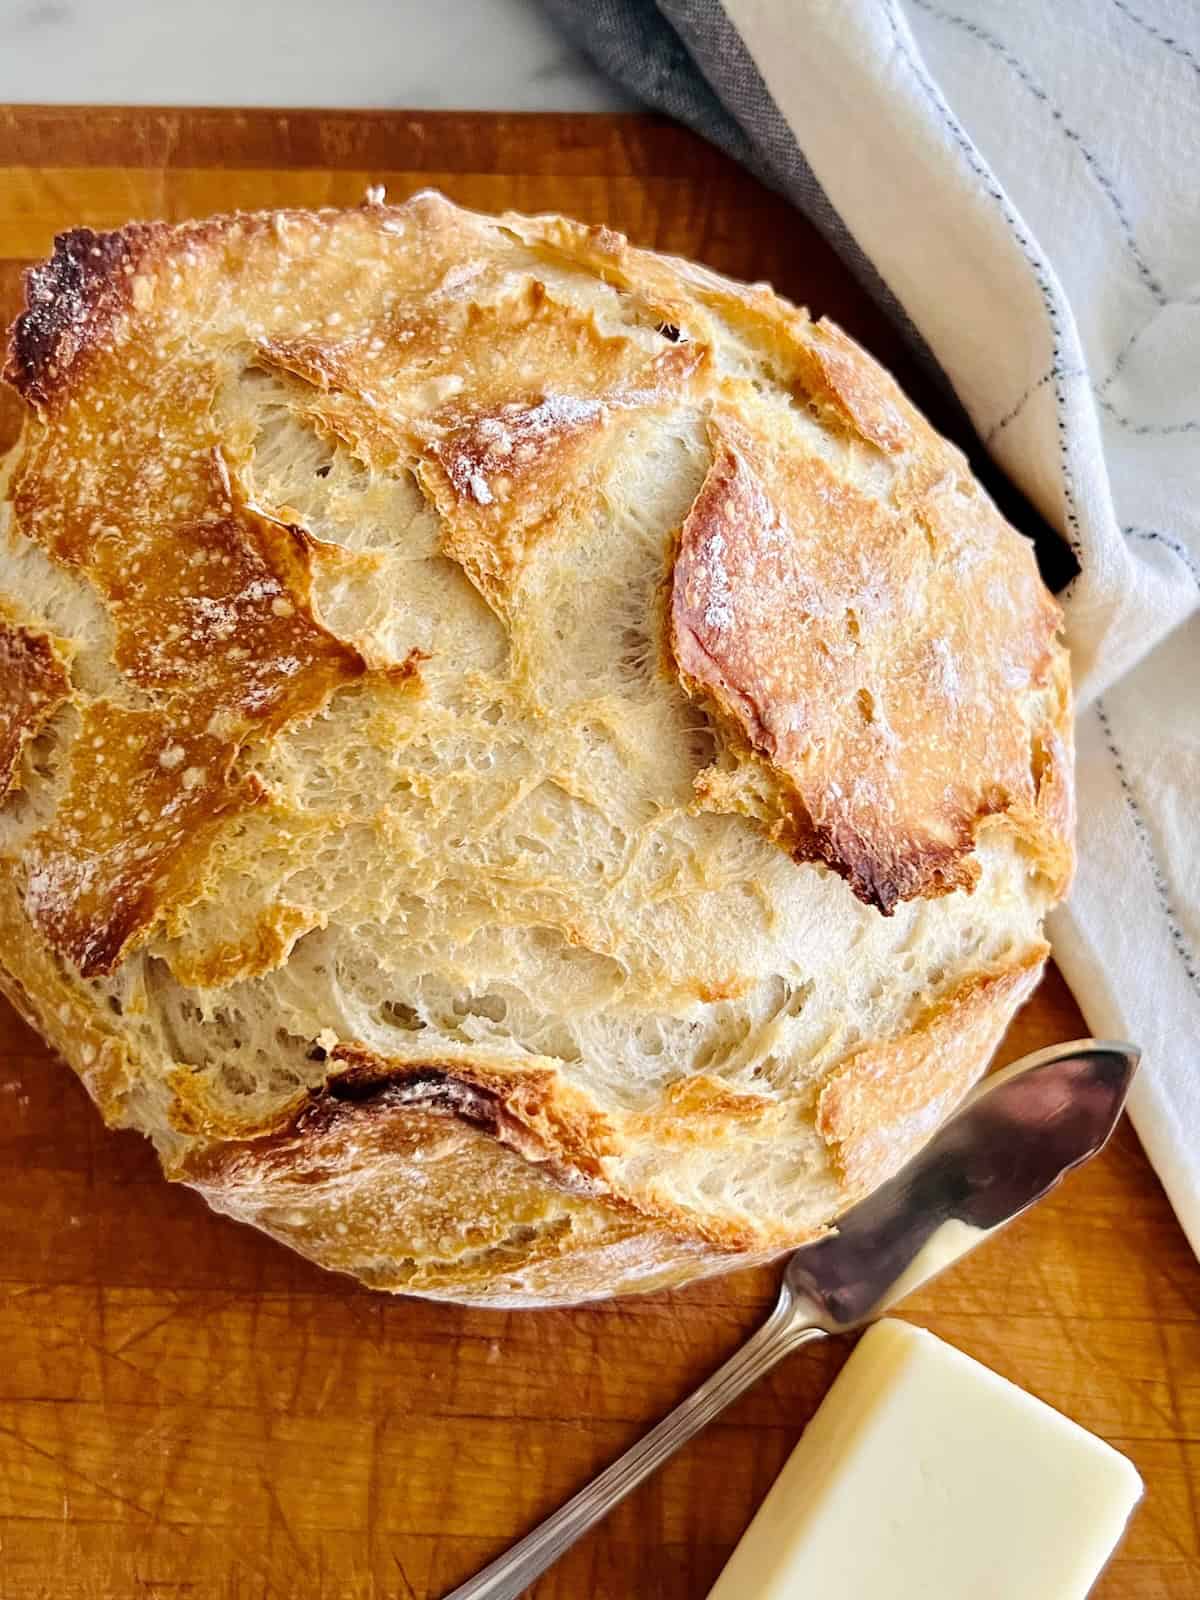
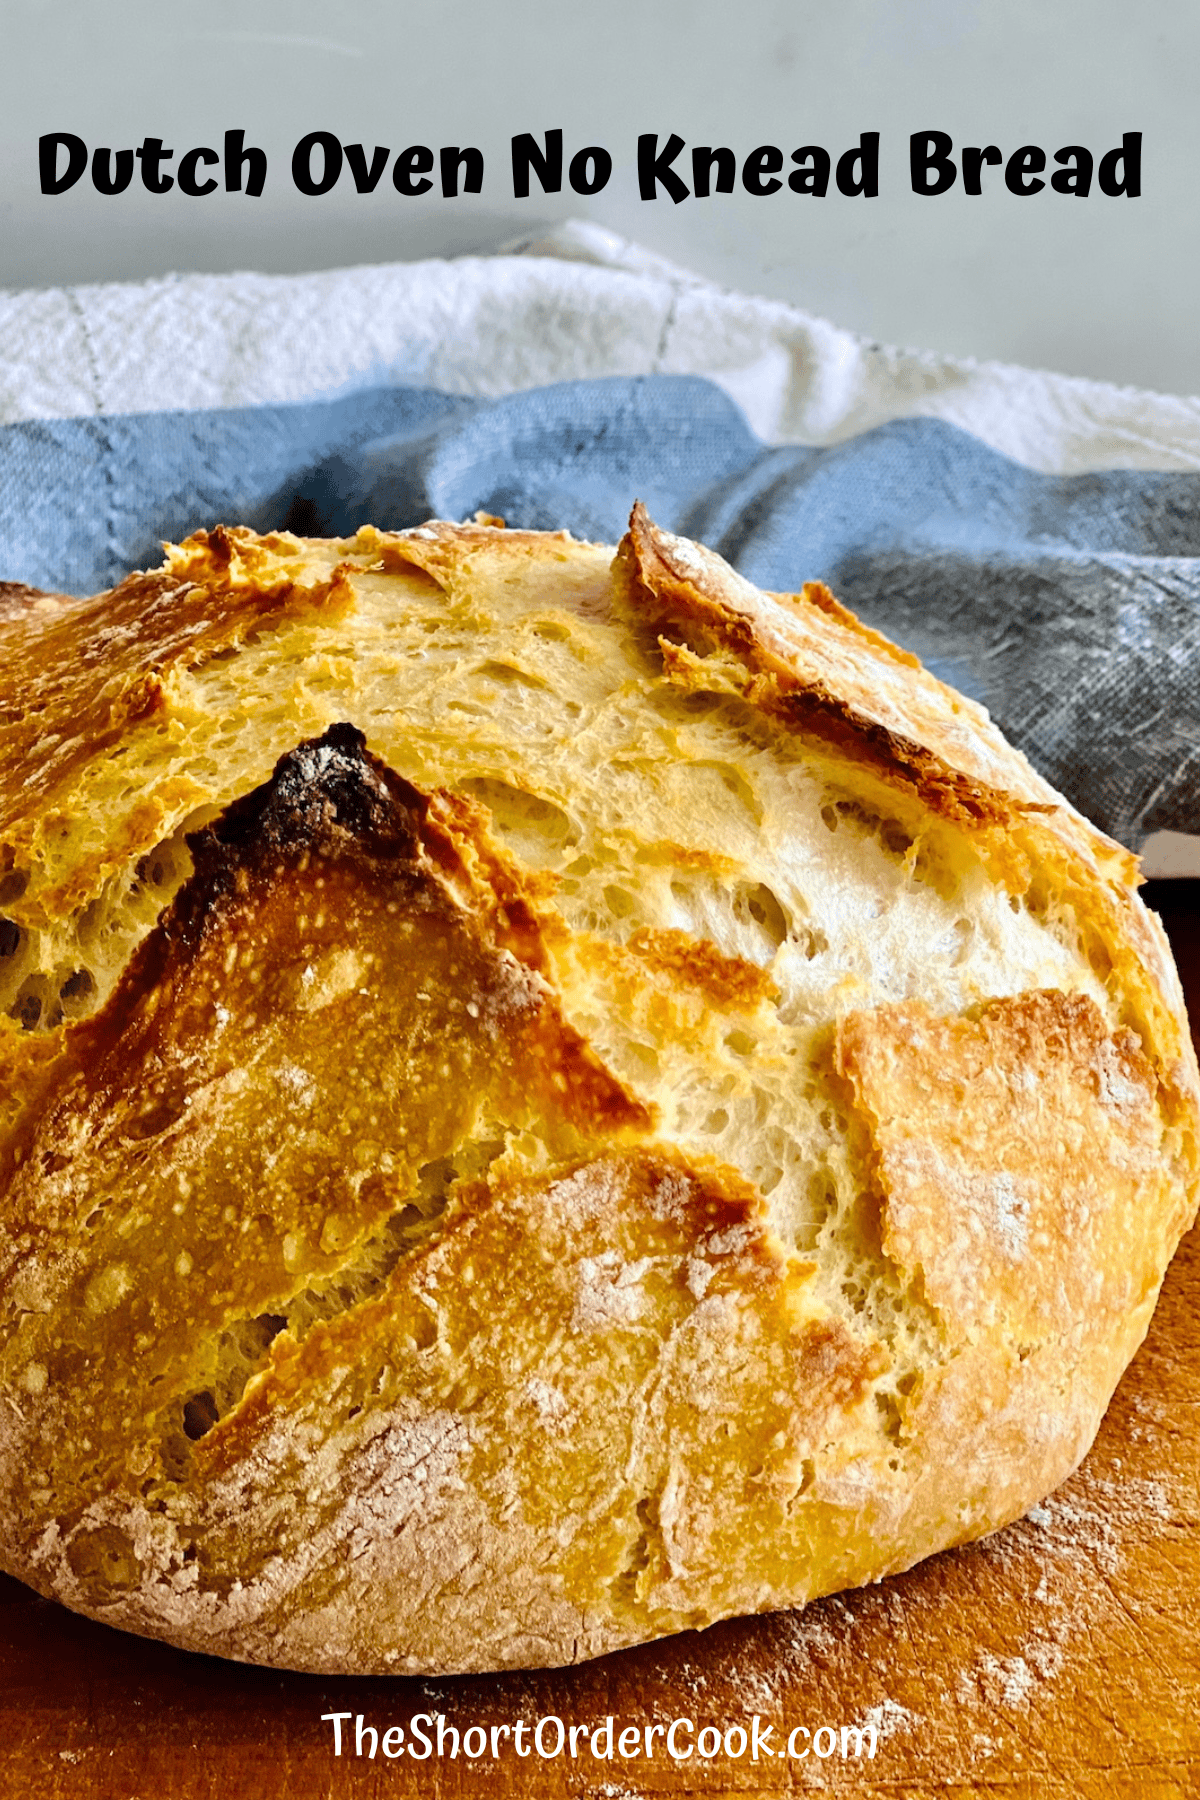
If you love crusty artisan bread, try a slice of warm homemade Dutch Oven No Knead Bread & wonder where it has been your whole life. Not only is it soft, fluffy, & delish but your whole house will smell amazing while it bakes.
Why this Easy No-Knead Bread Recipe is the Best: This simple recipe for a loaf of round crusty white bread takes just 5 minutes to prep.
Just like many people in 2020, I was teaching myself to make sourdough bread during the COVID pandemic. It is quite a process and though delicious, it is a labor of love.
So let's be honest, sometimes we just want a slice of warm fresh bread without the extra steps. That is where this simple yeast bread recipe that doesn't need kneading comes in.
Like my recipe for Dutch Oven Chicken Stew, my 6-quart Lodge Cast-Iron Dutch Oven does the magic. Ok, now we bake!
Jump to:
Ingredients
I know what you are thinking, why make bread when you can find it everywhere for sale? Besides it tasting so much better when fresh, it's also a money saver.
All it takes is just 4 cheap ingredients. It costs about $1 to make versus $4-6 to buy in a store or bakery!
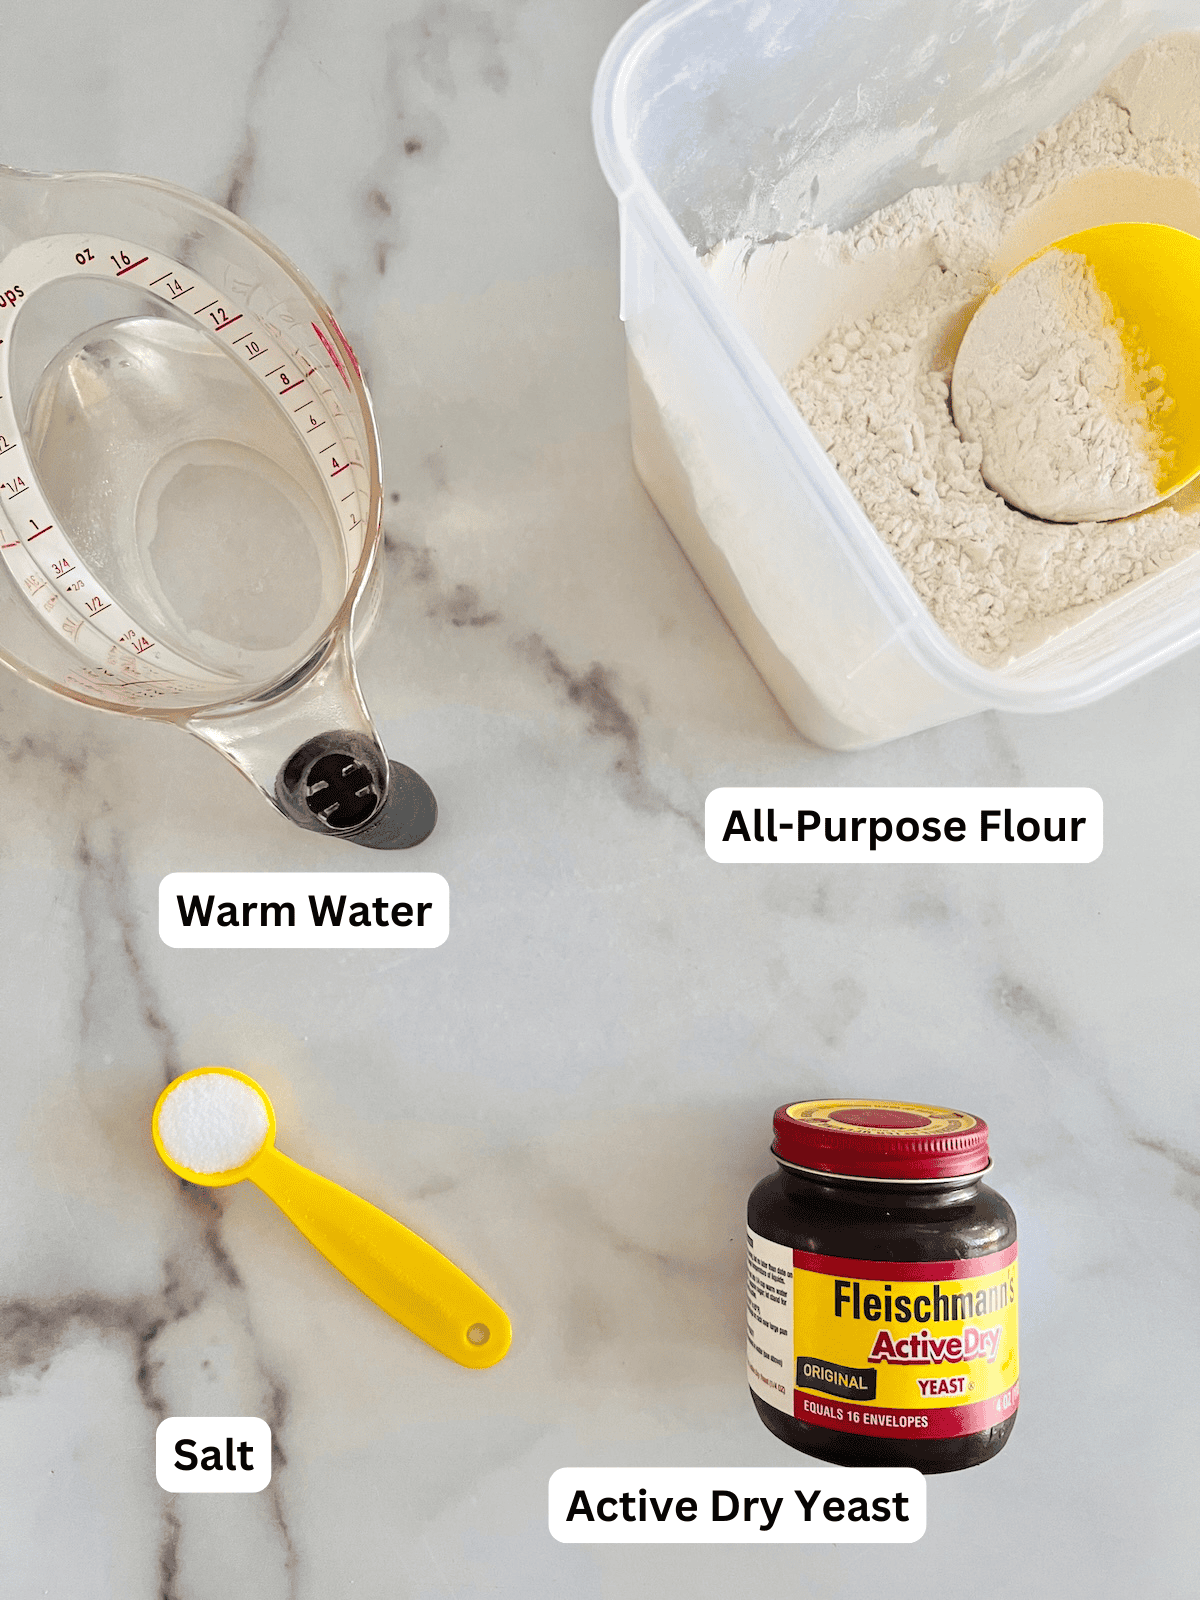
Here are the ingredients needed to make this recipe:
- All-Purpose Flour - regular white flour is used for a soft crust that is not too chewy & light airy insides, bread flour is not needed.
- Instant Yeast - fast-acting dry yeast is inexpensive & easy to work with.
- Salt - this gives the white bread flavor, don't skip this!
- Water - warm water between 105-110°F is what activates the yeast.
See the recipe card for quantities & substitutions/variations.
How to Make this Dutch Oven Bread
Do not let the fact that there are several steps make you think this will be hard to make. The steps are simple, concise, & I help make baking homemade bread a no fuss process.
The photos I share below will set you up for success every step of the way. Each image really helps you know if your bread is coming along correctly. I take the guess work out of bread making so go for it, you can do it!
Here are the easy steps for making white bread without kneading the dough:
- Make the Dough
- Let it Rise & Preheat
- Shape the Loaf
- Bake the Bread
- Cool & Slice
See the step-by-step instructions with photos below plus the recipe card at the end of the post.
1 - Make the Dough
In a large mixing bowl, add the warm water (between 100-110°F). Make sure to use a bowl that will have enough room for the dough to double in size.
Sprinkle in the yeast & salt. Use a whisk to dissolve it & get frothy. Let it activate and bloom for 2-3 minutes. It should smell "yeasty or sour" as it ferments.
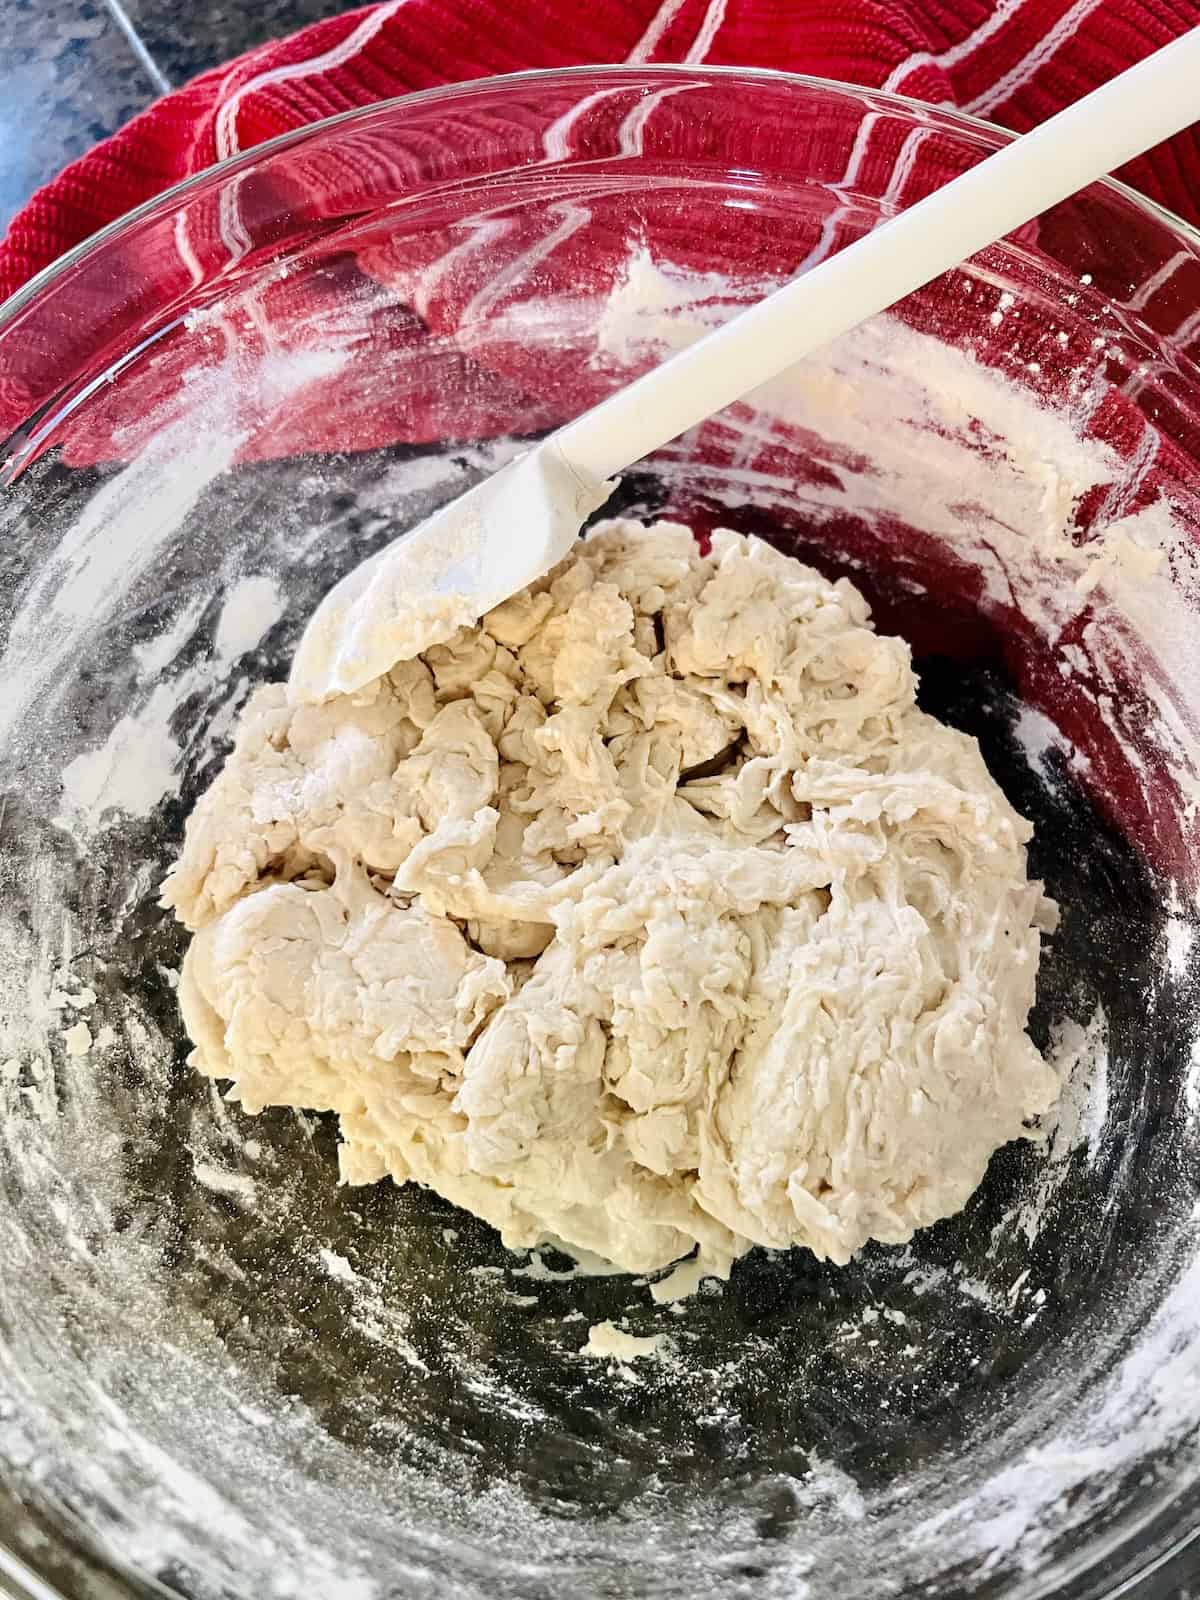
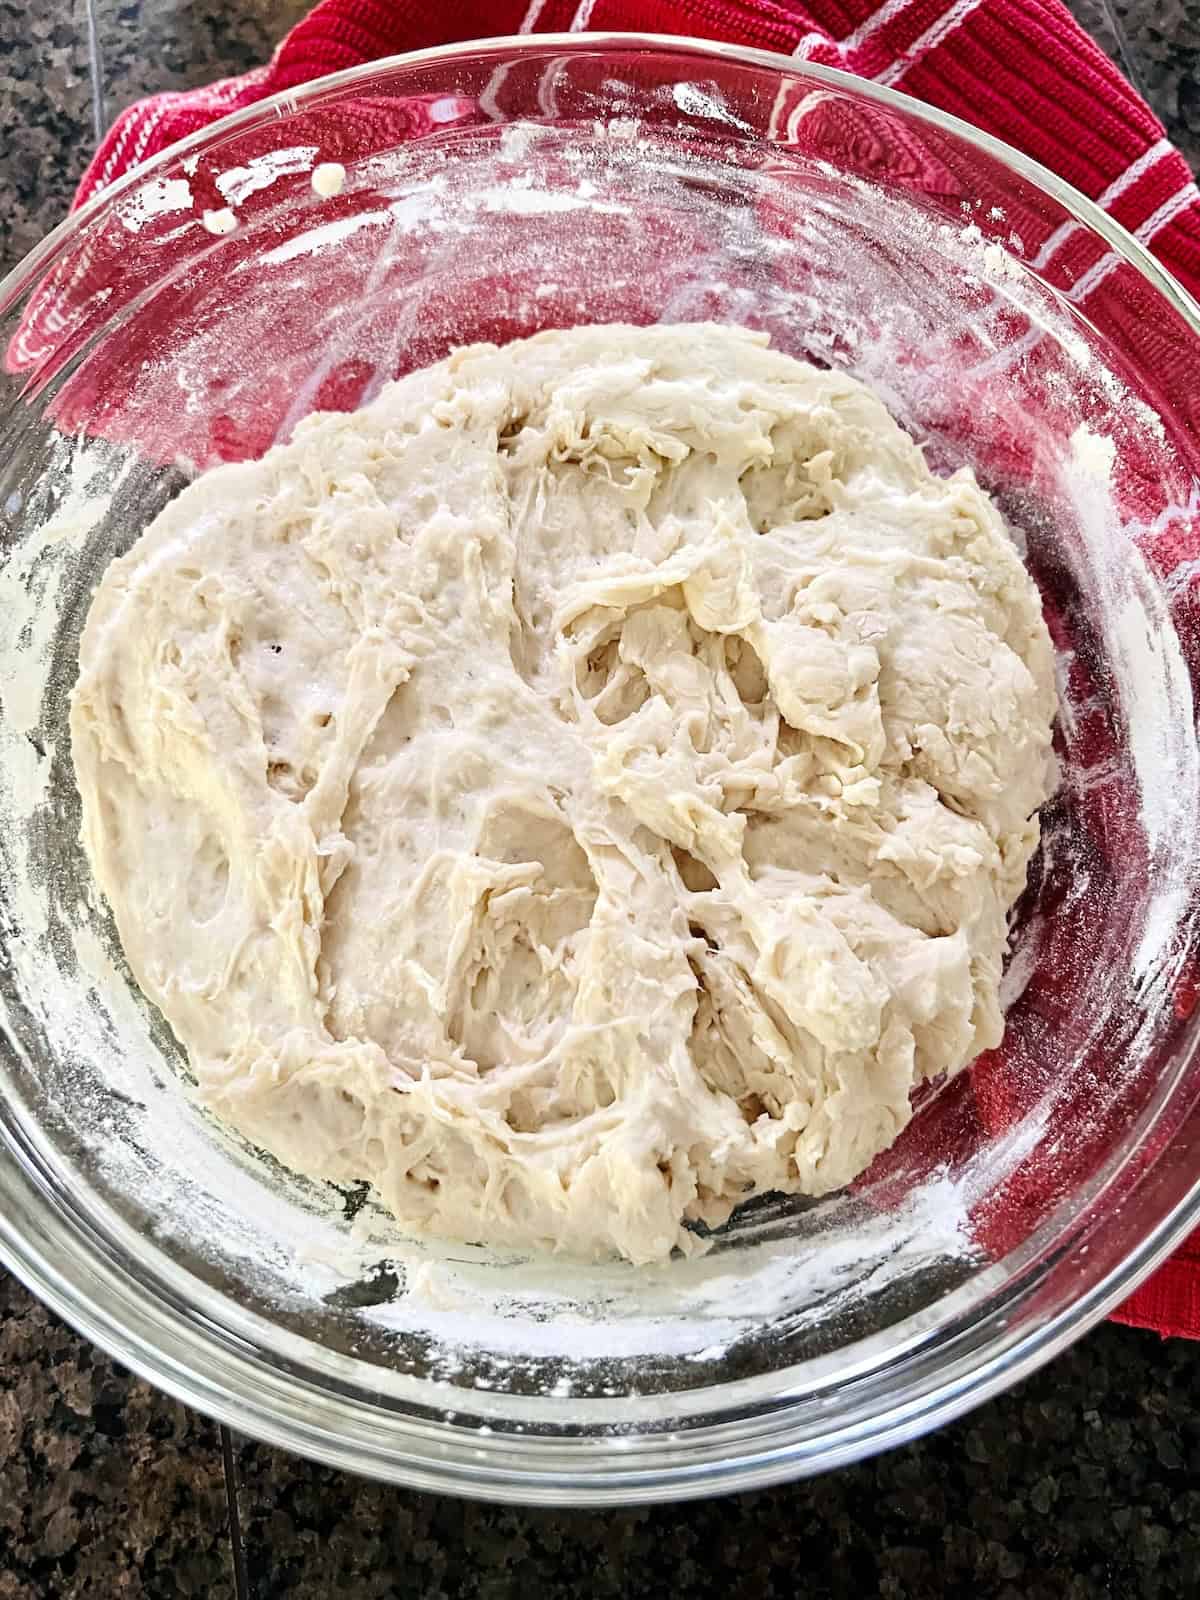
Add the flour and using a rubber spatula stir to combine. Scrape the sides and mix until the dough looks like the picture above - sticky, bumpy, & rough.
TIP: do not over mix or the bread will be tough.
2 - Let it Rise & Preheat
Cover the bowl loosely with a kitchen towel. That's it - no kneading needed!
Place it in a warm location in your house without a breeze or A/C blowing on it. The top of my refrigerator is my go-to place to let dough rise.
Let it rise for 2.5 hours. Once it has doubled in size like seen above, it is almost ready to bake.
PREHEAT THE OVEN NOW - set it to 450°F and place the dutch oven on the bottom middle of the oven so it fits without being too close to the top.
After the oven had been on for 30 minutes, it is time to prep the bread & get it in the dutch oven.
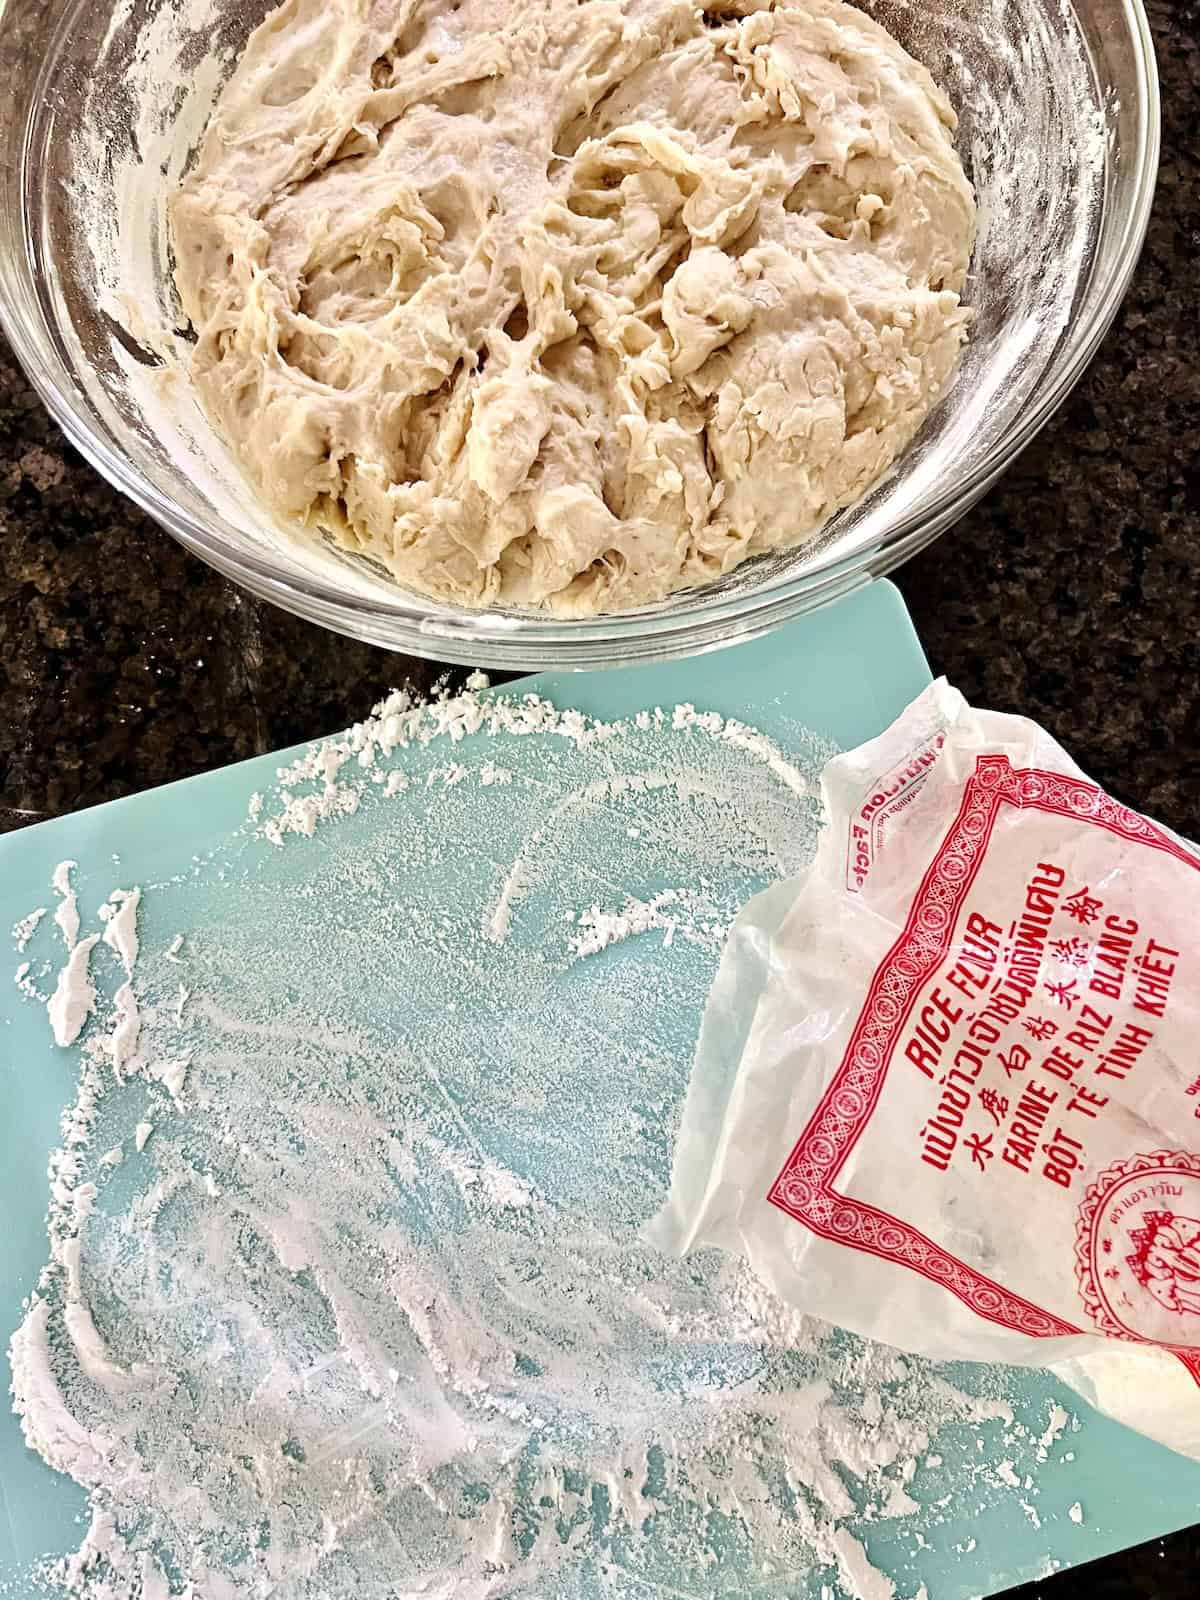
I like to dust a cutting board with rice flour (the gluten-free flour prevents sticking). Then gently scoop the dough onto the board.
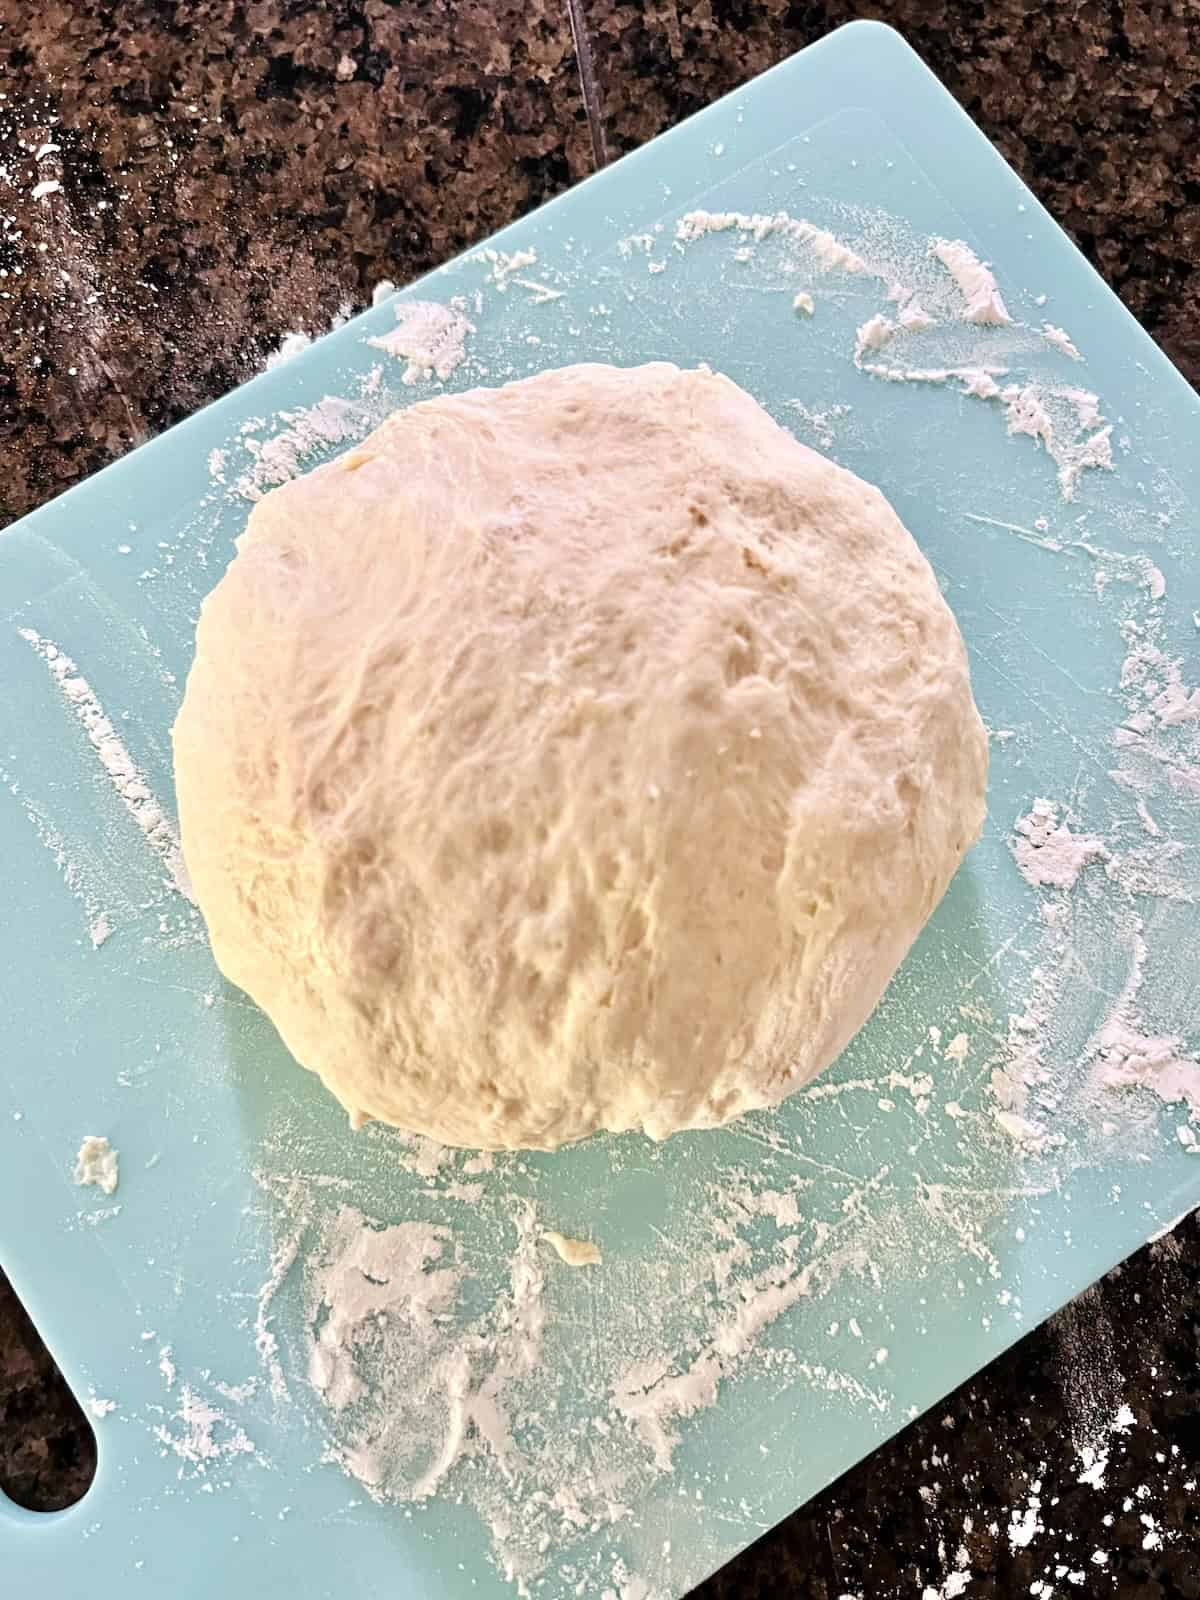
3 - Shape the Loaf
Gently use your hands to shape the dough into a large round ball. Try to not press or push too much so that the dough remains inflated & airy.
Carefully remove the hot dutch oven from the preheated oven. Sprinkle in some rice or regular flour & gently lower the loaf into the pot.
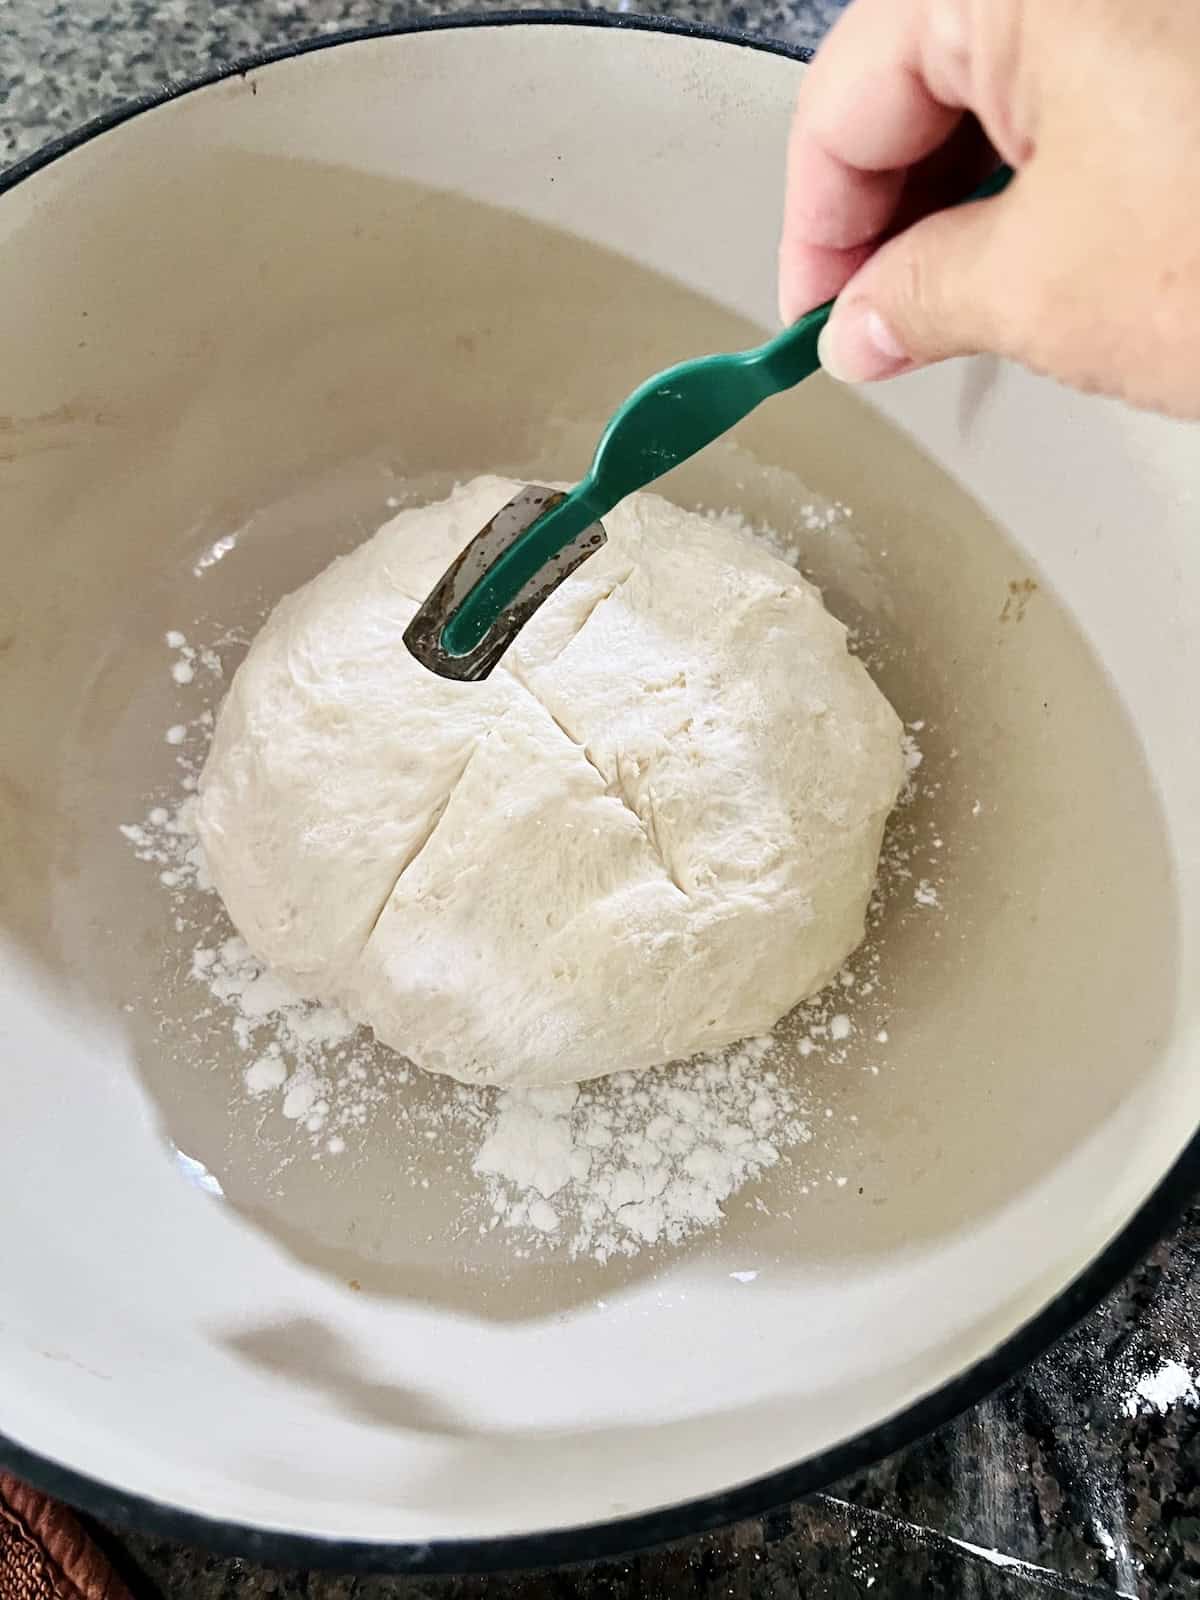
Score the top of the bread with any design or simple "X". Use a sharp clean razor blade or a bread lame/scoring tool.
4 - Bake the Bread
Place the lid on the dutch oven and place the bread into the 450°F preheated oven.

Bake for 30 minutes. Remove the lid & notice the bread will be light in color as seen above.

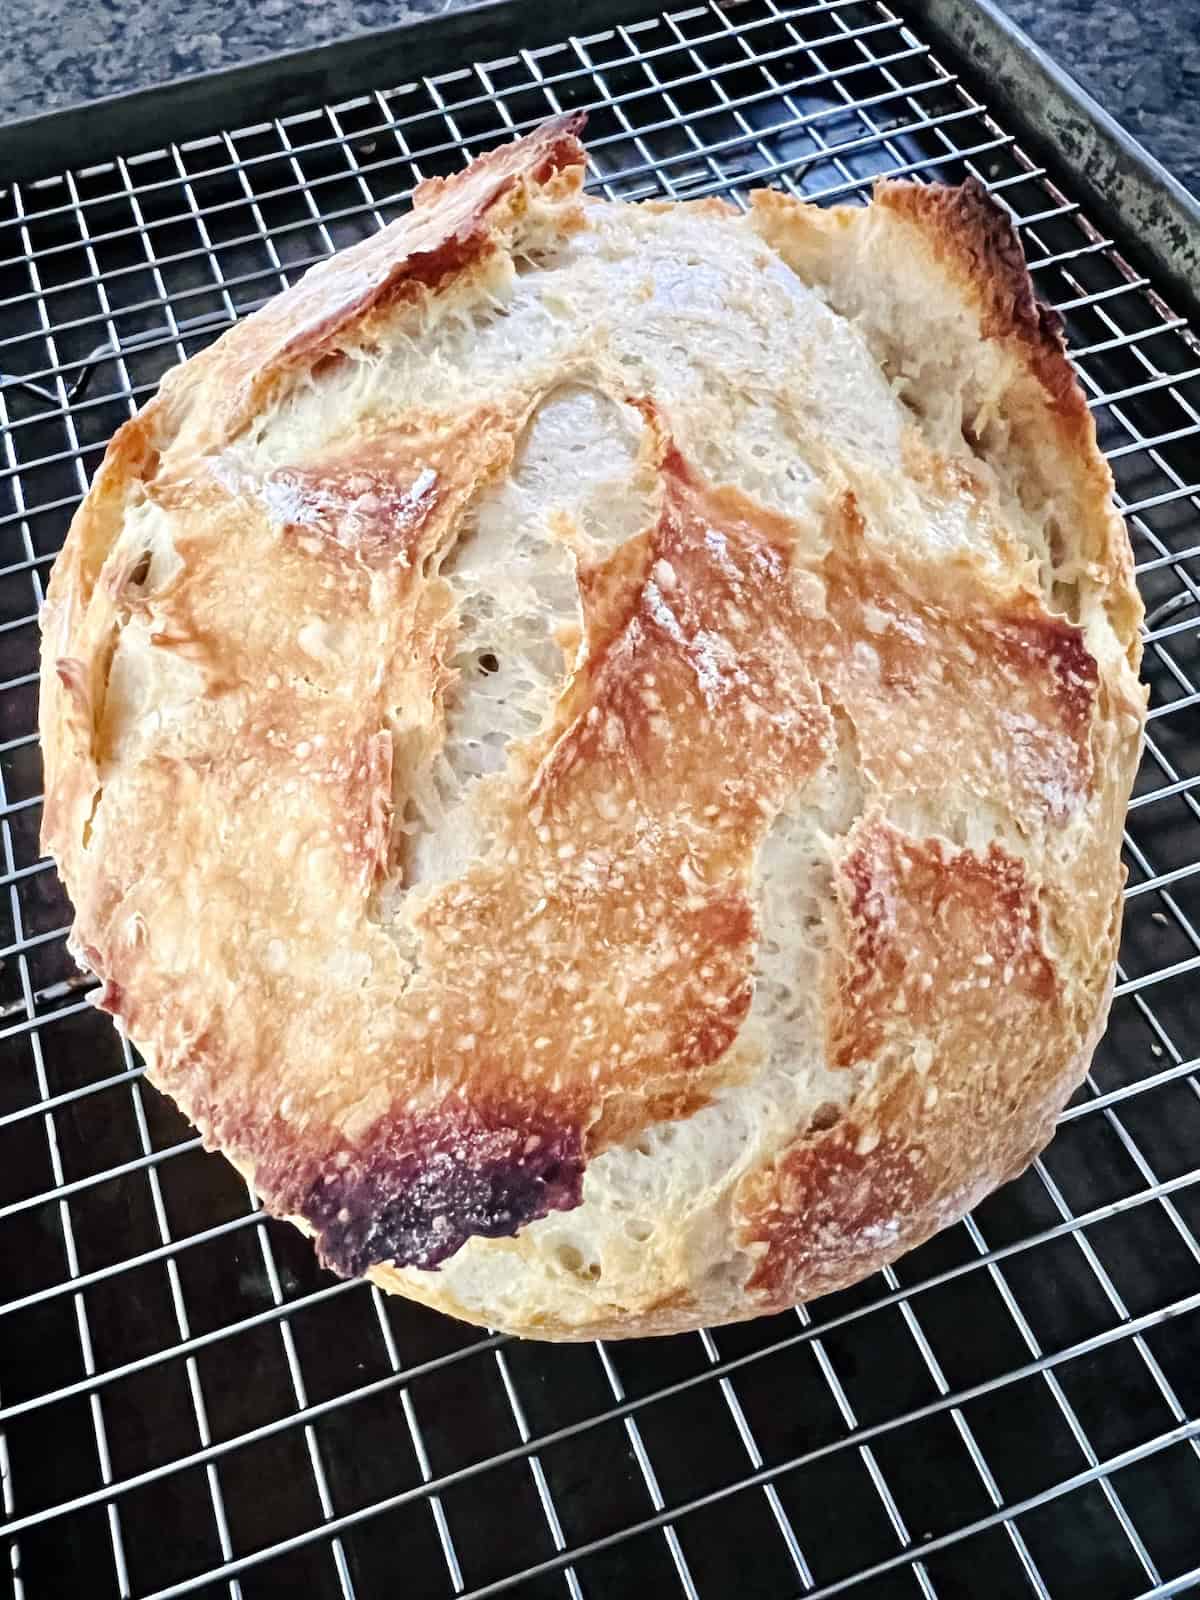
Bake another 10-15 minutes. The edges should be golden & crispy as seen above.
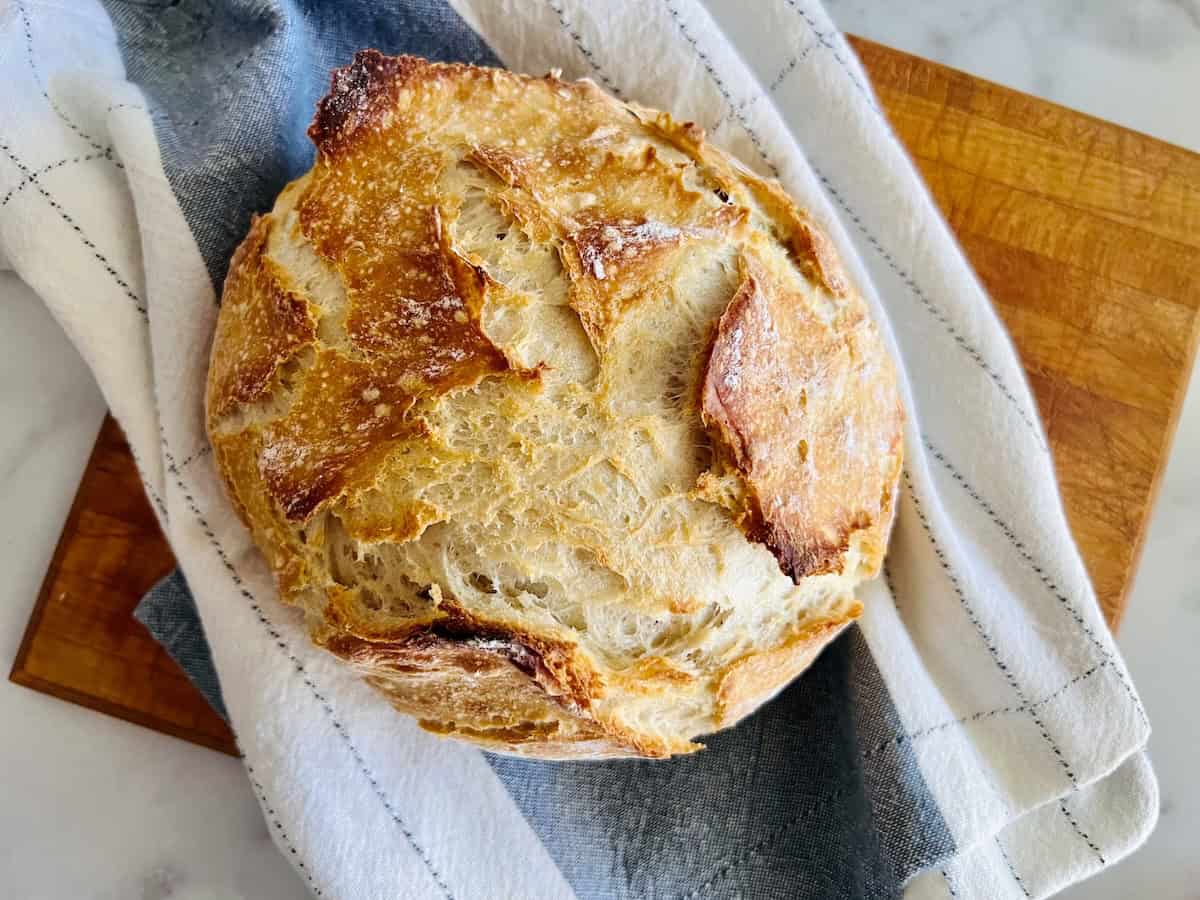
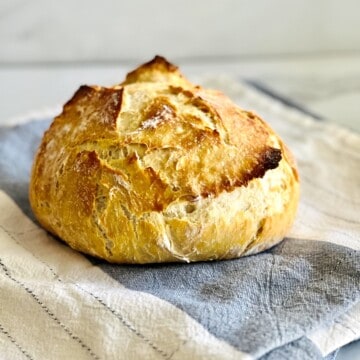
5 - Cool & Slice
Carefully lift / slide the bread out of the dutch oven & place on a wire rack to let cool.
I recommend cooling the bread for 30 minutes minimum before eating.
Cooling bread for 1-2 hours is ideal. This offers the best flavor & makes sure the inside isn't gummy due to the heat that still exists.
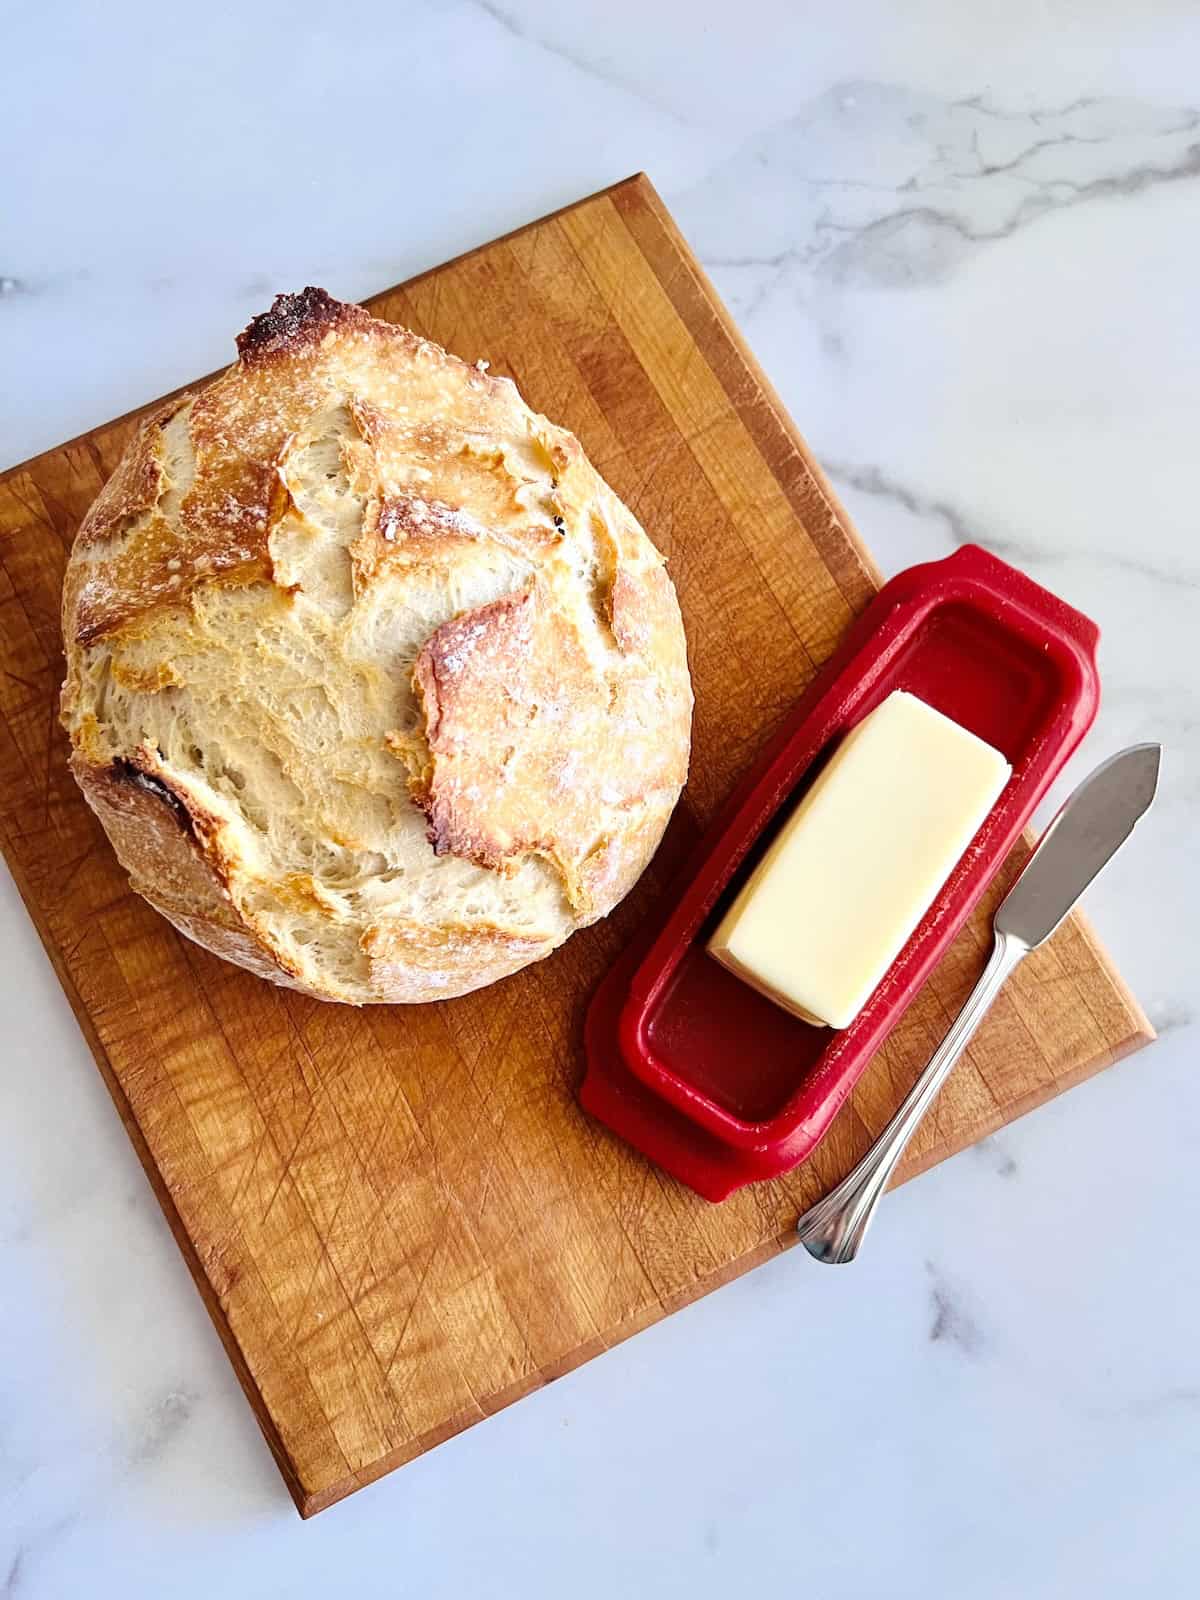
Slicing, Serving, & Storing
Once cool enough, use a sharp serrated bread knife to cut thin slices.

Serve with butter or make sandwiches. I like to toast day old bread & make fig & brie bruschetta all summer long.
This is best enjoyed the same day but will stay fresh for up to 3 days if stored in a cool dry place. Bread storage bags are inexpensive, reusable, & one of my favorite products. Or see recipe card for more tips.
What to Serve with No-Knead Bread : Just add some butter, jam/jelly/preserves, peanut butter, Nutella, or drizzle with Homemade Hot Honey. I can eat this plain while standing at the counter staring into space & be soooo happy.
It's also great with salads, soups, pastas, or toasted for breakfast with some soft scrambled eggs. Or pair it with one of this easy recipes to make a complete lunch or dinner:
Recipe Tips & Behind the Scenes
Here is my recipe for success - including what I learned when testing, funny stories or bloopers, and more.
- #1 Tip - make sure the water is between 100-110°F or the yeast will not bloom correctly.
- Preheating the dutch oven is important, don't skip it.
- For a lighter soft crust, only remove the lid after 40 minutes & for a darker crunchy crust remove it after 25 minutes of baking.
- A dutch oven is important for an even bake; I have not tried this recipe using any other equipment.
- Parchment paper sheets are also a good idea to use to keep the bread from sticking to the bottom of the dutch oven but a dusting of flour is fine in most cases.
- This bread is vegan & low-fat.
- I have NOT tried making this with other flours like whole wheat or adjusted this to make gluten-free bread.
- I recommend not cutting into this before ready to serve. This keeps it fresh & also keeps you from eating most of it before anyone else gets a chance.

Dutch Oven No Knead Bread
Equipment
- dutch oven 5-7 quart
Ingredients
- 1 ½ cups warm water between 100-110°F
- 2 ¼ teaspoon active dry yeast 1 packet
- ½ tablespoon salt
- 3 ¼ cups all-purpose flour
- rice flour or additional flour for dusting
Instructions
- In a large mixing bowl, add the warm water (between 100-110*F). Sprinkle in the yeast & salt. Use a whisk to combine & get frothy.1 ½ cups warm water, 2 ¼ teaspoon active dry yeast, ½ tablespoon salt
- Let the yeast activate and bloom for 2-3 minutes.
- Add the flour, using a rubber spatula, scraper, or spoonula stir to combine. I like to use a combination of both a stirring motion and a gentle fold. Scrape down the sides as you mix to be sure to get most of the flour worked into the wet ingredients.3 ¼ cups all-purpose flour
- Once the bread dough has no visible streaks of flour, it is done mixing. It will be bumpy & sticky. Do not over mix of the dough or your bread may come out tough versus light & airy.
- Cover loosely with a kitchen towel. Place the bowl in a warm/dry place (no draft) like the top of your refrigerator.Let it rise for 2.5 hours. Once it has doubled in size, it is almost ready to bake.
- Preheat the oven to 450°F and place the dutch oven in immediately. You want both the oven & the dutch oven to heat up together for 30 minutes.
- After the oven had been on for 30 minutes, it is time to prep the bread & get it in the dutch oven.
- On a cutting board or clean work surface dusted with rice flour (see note below). Scrape the dough out onto the rice flour. Gently use your hands to shape the dough into a large round ball. Try to not press or push too much so that the dough remains inflated & airy. * you can also shape the dough on parchment paper & lower it into the dutch oven instead of using the rice flour method.
- Carefully remove the dutch oven from the oven & remove the lid. Sprinkle a bit of rice flour into the pot so the bottom has a thin layer which will help the bread not stick as it bakes.
- Gently lift the bread dough up with both hands & carefully lower it into the dutch oven letting it gently drop in. Use a razor or dough lame to cut an X across the top.* or lower into the pot holding the edges of your parchment paper.
- Carefully place the HOT lid back on the dutch oven & place on the middle rack of your oven.
- Bake for 30 minutes.Remove the lid & bake another 10-15 minutes. The edges should be golden. * see notes below for a softer or crustier crust
- Carefully lift / slide the bread out of the dutch oven & place on a wire rack to let cool.
- Cool for 30 minutes before slicing. Enjoy while slightly warm.
Notes
- Place slices or the whole loaf into a brown paper or bread storage bags. Fold it over to keep if fresh & the air out. Don't wrap it tightly in plastic wrap or the crust really softens and looses any texture/crunch. Store in a cool dry place like your pantry or counter for up to 3 days.
- The bread can be frozen for up to 30 days. Wrap tightly to ensure there is no ice/freezer burn on the surface.
- Flour - use bread flour if you want a chewier crust that has more crunch. You may need to add an extra 1-2 tablespoons of water since bread flour has more protein/gluten.
- For a lighter soft crust, remove the lid after 35 minutes & bake uncovered 5-10 minutes.
- For a darker crunchy crust, remove it after 25 minutes & bake uncovered for 15-20 minutes.
Nutrition
More Fresh-Baked Bread Recipes
Here are some similar recipes for homemade loaves or rolls of bread:
Lori says
Amazing taste cooked beautifully and incredibly simple. Thank you!
Angela says
You are welcome!
Robin says
Just decided to whip up your no knead bread to go with the Cuban Picadillo we are having tonight, really easy and looks delicious, can’t wait for dinner😋
Robin says
very easy to make & tasty but needs a little bit more salt
Angela says
Thank you for the comment.